
by editor | Dec 2, 2019 | K-12 Activities
Favorite EE Activity Ideas
from PNW Educators
Practical and proven environmental education activities for all grade levels and subject areas, shared by members of the EE community. What is your favorite?
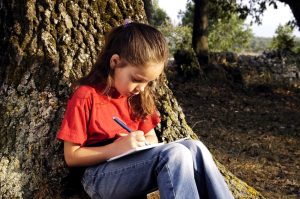
 Nature Journal
Kristen Clapper Bergsman
My favorite EE resource is a hardback journal with blank pages ready to fill with observations and revelations. Step into a circle of cedars, nestle down in meadow, or sit down on your back porch stairs and nature emerges all around you. Creative nature journaling is a powerful educational tool for young children and adults alike. I use journaling as both an educational activity and as a way to reinvigorate my teaching and writing.
A hardback journal can take the knocks of being thrown into a backpack and carried into the field. You can waterproof your journal simply by slipping it into a gallon-sized Ziploc bag. Toss in a waterproof pen, a pencil, a sharpener and perhaps a few watercolor-pencils and you are ready for five-minutes or five-hours of immersive journaling.
Some people are hesitant about their drawing or writing skills, but by using some simple journaling exercises, you can soothe people’s fears about their own abilities. Even young children quickly connect with journaling exercises like gesture drawings, blind contour sketches and event maps.
I highly recommend several natural journaling books that provide sample activities and ideas on how to use journaling as an education tool, as well as having pages filled with lush examples of field journal pages. Keeping a Nature Journal by Clare Walker Leslie & Charles Roth (Storey Books, 2000) is an excellent resource for teachers who want to use nature journaling with their students. Into the Field: A Guide to Locally Focused Teaching by Leslie, Tallmadge and Wessels is available through the Orion Society�s Nature Literacy Series. Hannah Hinchman�s A Trail Through Leaves (W.W. Norton and Co., 1997) will provide pages of inspiration.
Complete Citations:
Clare Walker Leslie & Charles Roth, Keeping a Nature Journal. Vermont: Storey Books, 2000. Pg. 181. ISBN 1-58017-306-3.
Leslie, Tallmadge and Wessels,� Into the Field: A Guide to Locally Focused Teaching. Massachusetts: The Orion Society, 1999. Pg. 83. ISBN 0-913098-52-3.
Hannah Hinchman, A Trail Through Leaves. W.W. New York: Norton and Co., 1997. Pg. 192. ISBN 0-393-04101-8.
Kristen Clapper Bergsman is an environmental educator and freelance writer. She owns her own curriculum development company, Laughing Crow Curriculum. She and her husband share their Seattle neighborhood with over 9,000 crows.

Changes
Tracy Mosgrove
Grade Level: Kindergarten through High School.
Students take a designated outdoor space and observe the changes in that space over a period of time (several months during a change of seasons works best). Depending upon the age of your students, the size of space and the way in which you record the changes varies.
Kindergarten through primary grades: Measure out one square meter of ground. This can be one space for the whole class, or groups can each have their own square. In simple field journals, students draw and write words or sentences about what they see. Simple language arts and math integration can be used through what they find in their square.
Intermediate through high school: Each group or individual child measures one square (or cubic) meter. Observations can be recorded through the use of a digital camera, field journals, or PowerPoint/Hyper Studio presentations. Math (graphing, data collection), Language Arts (cause/effect, writing descriptions) can easily be integrated.
Intermediate through High School: Each student measures a square meter or takes a larger area (Iíve had students use a mile long hiking trail in a forest). Use science probes, soil testing kits, digital cameras and field journals to research and record data. Talk to builders, foresters, farmers, etc. to find out how the changes in the ground affect their jobs and work schedules. Math (graphing, data collection), Language Arts (cause/effect, writing descriptions, letter writing to industry people) can easily be integrated.
Tracy Mosgrove
Skyway Elementary School
Coeur d’Alene, Idaho
tmosgrove@sd271.k12.id.us
Let Them Eat Cake
Sarah Bidwell
My favorite activity is “Let Them Eat Cake” from Facing the Future: People and the Planet Curriculum Guide. This is a very effective and interactive activity for demonstrating the inequitable distribution of resources around the world. Students are divided into world regional groups (i.e. Asia, Africa, Europe, etc) and given a slice of cake relative to their regions’ share of global resources. The Asia group (about half the class) gets only a sliver of cake, while the one person from North America gets a quarter of the cake! Students really see how consumptive Americans are relative to people around the world. You can download the activity from their website, www.facingthefuture.org.
Sarah Bidwell, Administrative Director Alternatives to Growth Oregon
Fish in the Floodlight
Joanne Day
One of my favorite environmental education resources is the Fisheries and Oceans resource “Fish in the Floodlights.” This package contains nine short plays about salmon for grades 4-7.
The plays are useful for teaching about salmon and there are themes of conservation and also social responsibility.
Drama can be a very creative tool for working with students to both empower them and to widen their understanding of ideas and issues in the world. Critical thinking skills can be developed as the students perform plays adopting different points of view.
Each play also contains suggestions for the use of cooperative learning strategies such as Know, Wonder, Learn, as well as integration with other subjects, such as art and math.
The package is very versatile and allows for plays to be read between students or performed before the entire school.
It can be ordered through the BC Teachers’ Federation Lesson Aids service at www.bctf.ca
Look for it under the title “Salmonids Go to the Ocean.”
 Food Web Game
Joanne Day
Note: If weather and opportunity permits, you may wish to do this webbing activity outdoors (i.e. in the school field). This webbing activity can also be done as a stand alone activity during any outreach event (indoors or out).
1. Review the definition of a food web.
2. Have the students sit in a circle and hand out the species cards randomly. Ask students to put up their hands when their species name is called out. Have a role of string with you to pull throughout the circle, making connections between different species in the food web. At each connection (student), the student is asked to hold tightly to the string. Start with the Sun and pull the string to the plants that require the sun for energy. Then feed the string to the animals that require the plants for food. Continue this process in the order of species below: plankton and bull kelp, barnacles, sea star, crab and shrimp (scavengers, would go after a dead bit of sea star)…now back to another plankton eater (since there are so many animals that eat plankton) – Pacific herring, salmon, cormorant, harbour seal, stellar sea lion, Pacific white sided dolphin, blue shark, killer whale (top predator), and finally the human. By the end of this exercise, the string in the middle of the circle should look like a spider’s web.
While handing out the string revisit the interesting facts of each species and explain again how they fit into this food web. Some examples have been incorporated above. Since the plankton has not been explained extensively to this point, include some information on these free-floating organisms. Q. What are plankton? A. They are “wanderers”; microscopic plants (phytoplankton) and animals (zooplankton) that drift in the ocean currents. Q. Why are plankton important in the ocean food web? A. First of all they provide the base food supply for many of the ocean creatures. Secondly they (along with ocean seaweed) produce over half of the oxygen that we breathe. We always think of the trees in the forests as being important for producing oxygen. They are, however, the ocean plants produce even more than the land plants. Q. Ask the students if this is another good reason to keep the ocean healthy. To reinforce, now or later ask the students to take a big breath and say “Thank you to the plankton and the seaweed!”
3. After the web has been formed get all the students to stand up while holding onto the string. Q. What does the string pattern remind you of? A. Many will say spider web and you can make this connection to the term food web to help them visualize the concept. The students can now see that they are part of a large ocean food web. Revisit with the students some of the factors mentioned earlier on in the presentation that could negatively effect this web (such as oil pollution, overfishing etc). Select one of these disturbances and incorporate it into the activity. An example of this would be oil pollution. Q. After an oil spill what would be the first organisms that would be negatively affected? A. The plankton would die since they would no longer be getting any exposure to the sunlight. Q. If the plankton die what happens to the rest of the food web? A. All the other organisms will be negatively affected. Some of the smaller ones will die and thus will no longer support the larger organisms which in turn will die or have to leave this ocean environment in search of a new food source. Get the students to actively demonstrate this negative impact on the food web. This can be done two ways.
Option 1: Get the plankton to sit down and then a tug the string to the next person in the web directly connected to them. Once the other students feel a tug they also sit down until everybody but the sun is sitting down.
Option 2: Get the plankton to let go of their string. Ask the students what next will get affected (i.e. who has a loose string hanging down, indicating their food source is gone). As the students lose their food source, they too drop their string until everybody is standing up and the entire web is on the floor.
Joanne Day, Information Co-ordinator
Stewardship and Community Involvement Unit
Habitat and Enhancement Branch, Fisheries and Oceans Canada
Government of Canada
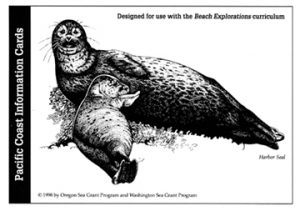 Pacific Coast Information Cards
Margy Ransford
Here is a bit about one of my favourite resources, which I use in the classroom and in public education.
Pacific Coast Information Cards, beautifully illustrated black and white recipe-sized cards with pictures of Pacific Ocean species (one species per card) on one side, and a description of the following “need to know” tidbits of info. on the flip side: Common Name
Latin Name
Range
Habitat
Quick Identification (basic physical description)
Predators (or, as I tell the kids, what eats them)
Feeding Type: (“what they eat”)
Commercial Value” (how humans have historically perceived them)
Status: common, rare,
Comments: special features of interest
These cards can be used in many different activities–I like to give a few to each student to sort when introducing classification and let the students loose to come up with their own criteria, or guide them with preset (for example, phyla) categories. Foodchain sequences are another great way to get the students engaged. First nations’ use of the organisms, and harvesting methods in modern economies, are other great focus possibilities.
The Pacific Coast Information Cards were published in 1998 by Oregon and Washington Sea Grant Programs. The artists were Karl Geist, Philip Croft and Mark Wynja, Cooper Publishing, editing , design and production. Gloria Snively at the University of Victoria, British Columbia, Canada, one of my “marine mentors”, was the author, and commissioned the creation of the cards to accompany her “Beach Explorations” curriculum. I highly recommend this resource.
You will want to possibly laminate them for frequent use!
Margy Ransford, past-President, NAME (Northwest Aquatic and Marine Educators)
 Crumple Your Own Watershed
Erica Ritter
Make your own three-dimensional map, and use it to explore how flowing water defines the areas of land we call “watersheds.” This activity provides opportunities for creativity and for meaningful discussion, a great combination for engaging students.
You can have each student make their own, or have groups collaborate.
Loosely crumple a piece of graph paper, unfold it but don’t smooth it out, and tape it onto a stiff backing so that the remaining wrinkles and creases resemble mountain ridges and valleys.
Use brown, purple, or black ink to identify and mark the ridgelines — “where water would ‘choose’ whether to go on one side or another.” These are the lines that define a watershed: on one side, the water will go one direction, and on the other side, the other. (The Rocky Mountains are the classic example of a defining ridgeline: raindrops that fall to earth on either side of the main ridgeline may end up flowing downhill to oceans thousands of miles apart.)
Use blue ink to trace where you think water will gather into rivers, lakes, streams, etc. These are the water-bodies that the water is shed into. Water connects areas of land — discuss various ways water connects landscapes, local bodies of water that define students’ home watersheds, etc.
Use other colors to add farms, houses, factories, roads, cities, etc. If students are planning out an island or city, this process can be quite elaborate. The grid-lines on the graph paper can be used to designate personal land areas in group projects, or to estimate the relative sizes of farms, cities, etc.
When “all done,” bring the landscapes over to a suitable table, and “make it rain” with the squirt bottle. (Squirt water onto the map until it runs down the creases.) See if student’s drawn-in blue rivers correctly anticipated the flow of water; did any cities drown? If landscapes sag, this may be a good opportunity to discuss how forces of nature (including water) can cause similar effects in real life.
In addition to watching the water, watch the colors it carries with it. Colors from uphill things will smear downhill, and water bodies below populated areas will show the effects. If you let the paper dry, the end result is often quite beautiful, with streaks of color from the ridges and valleys.
While watching the colors run, you can discuss connections to local watershed issues, such as dams, agricultural or urban runoff, water-rights negotiations, etc. One of my favorite all-purpose factoids is the “Fido Hypothesis:” in California, Florida, Idaho, and Virginia, researchers have found that dog “doo” runoff from parks and yards contributes dangerous bacteria to lakes and coastal waters, sometimes to the point where it’s unsafe to swim at local beaches. (Dog doo can be responsible for 10%-30% of the fecal coliform bacteria in coastal waters, including the now-infamous E. Coli.)
You can also discuss other kinds of land features, and what their analogies would be: sponges for wetlands, tiny clay dams, permanent-marker forests or other structures that resist runoff.
Some teachers extend this basic activity to teach students to read contour lines. (To make this work smoothly, it’s helpful to crumple the paper around something so that there’s one mountain peak and all the slopes can be reached from outside by the fixed-height pen. This isn’t as useful for showing watersheds, as it tends to eliminate meandering valleys, but it’s way easier to show contour lines around a single mountain.)
Prop a waterproof pen or pencil at a fixed height (tape it securely across a ruler, or stick it horizontally through a paper cup or piece of cardboard, so that the point stays the same height). Slide the pen around against the crumpled ridges, marking an equal-height line. Mark other lines at other heights the same way; 3 or more heights is appropriate. At the end of the activity, unfold the papers. The now-flat paper approximates a topo-map of the origonal surface. (There will be a few discrepancies, and steep slopes will not show up as dramatically as on a real topographical map. A photocopy or photograph of the intact crumpled paper would be more accurate, but not as beautiful.)
This activity has been documented several times, so you may be able to find it online. The version I use is currently available at http://www.omsi.edu/teachers/psd/
2000/watershed/crumple.pdf. Credit goes to Chris Maun for the version in “The Living River: An educator’s guide to the Nisqually River Basin,” and to Greg Dardis who originally adopted that activity for use at OMSI (the Oregon Museum of Science and Industry).
The “Fido hypothesis” was reported in USA Today (06/06/2002, “Dog waste poses threat to water” by Traci Watson, USA TODAY), and in other sources.
Erica Ritter is a science educator at the Oregon Museum of Science and Industry in Portland, Oregon.

Photo by Stewart Wilson from Cranbrook Guardian
Macroinvertebrate Mayhem
Karen Lippy
One of my favorite activities, Macroinvertebrate Mayhem, comes from (of course) the Project WET Curriculum and Activity Guide. If you liked Project WILD’s Hooks and Ladders, you’ll love this one!
Students get to act out macroinvertebrates while playing a game of tag. Sensitive critters have challenging “hindrances” to cope with. For example, caddisflies have to play in their case….a pillow case. And, stoneflies need to get extra oxygen by doing push-ups every ten steps. The mayflies flap their gills wildly.
Various “Environmental Stressors” race around tagging macroinvertebrates out. Survivors play on. Tagged macroinvertebrates can come back, but if they were a sensitive species, they return as a tolerant species.
This activity clearly demonstrates how water quality affects macroinvertebrates and how diversity and populations are affected by the health of their ecosystem.
Karen Lippy is an award-winning teacher in Shelton, Washington.
 Naturalist’s Journal
Tim Maze
One of my favorite activities is simply teaching students to make a naturalist’s journal. Using examples of Olaus Murie’s journal or the journals of Lewis and Clark is a good way to model and begin. We go outside for a few minutes and record the date, place and some weather data and then do a field sketch or a writing in response to a prompt. The journals can be worked into lots of areas of instruction or can become a phenological study themselves. A good journal makes for a good keepsake of a field trip or school unit or year.
My favorite EE resource is simply the outdoors. Just stepping out for a teachable moment in the school yard can be very inspiring. Recently we experienced a beautiful frosty morning, so I took my students out for a quick peek at the huge frost crystals that had formed. Great lesson, followed by cool student questions. The entire experience took maybe 15 minutes. You don’t have to be much of an expert to find something pretty interesting right in your own backyard (or schoolyard!).
Tim Maze teaches at Tongue River Middle School in Wyoming
 Dancing Up Worms: A Teachable Moment
Laurelei Primeau
It was a damp, sunny day, and my grade three class was called to the front lawn of the school for a school-wide portrait. Classes from kindergarten to grade five trooped out and jostled for places on the lawn. My third graders, however, were distracted. They were peering into the long grass at the gigantic earthworms that were wriggling at their feet. Seeing other students shy away and shriek at the worms, my class sprang into action, the bravest of them picking up the worms and moving them to the edge of the grass, away from the stampede of feet. Eventually, we were chastised for holding up the photo, and my worm wranglers were themselves wrangled into place.
With the photo shoot completed, the students looked around frantically for the worms. The questions came fast and furious – why would the worms come out when they’re going to get stepped on? One child suggested that worms come out when they feel the ground shake. We decided to test it and find out. We spread out on the lawn and stomped up and down, and up popped a worm. Jubilant, the students danced more vigorously, laughing. The office staff was laughing pretty hard, too. Every student danced a worm up out of the ground that morning. We observed them, and let them go, and finally headed back inside.
Laurelei Primeau teaches in the Coquitlam School District in Coquitlam, British Columbia</em?\>

by editor | Aug 27, 2017 | K-12 Activities
Environmental Education Activities K-12
a potpourri of teaching ideas for the classroom

GRADES
K-2
Science
Flannel Beach Life
Cut out pictures of intertidal animals from calendars or a cheap field guide. Laminate pictures and use stick-on velcro to turn them into flannel board creatures. (You can also purchase a set of flannel patterns from the Seattle Aquarium). Use the flannel board to introduce the intertidal animals. If possible, have students act out the movements of each, for example, pretend to be anemones and wave arms as tentacles during high tide, cover up tight at low tide.
Garbage Gardens
Have students bring in an egg carton and empty halved egg shells from six eggs. Pierce the bottom of the egg shells and fill them with composted soil. Place the egg shells in the egg carton to keep upright. Plant various types of seeds in the egg shells. Make sure to label each student’s egg carton with their names and the types of seeds they planted. Extend the learning by creating experiments dealing with the effects of natural environmental variations such as light and water as well as “artificial” variations including the application of household hazardous wastes found in the classroom (check out areas around your sink for these products). — TGP
Social Studies
Nautical Neighbors
If there is a marina area, take the class on a tour of it. Arrange a tour of a fishing boat, and have the skipper explain all the different equipment and the variety of jobs aboard the craft.
Seafood Survey
Many cultures depend heavily on food from the sea for their sustenance. Have students survey family members and friends about the types of seafood they like to eat. This can be graphed on the chalkboard as well. Follow up survey with a visit to a local fish market or grocery to look at varieties of fish and shell fish up close.
Mathematics
Whale Milk Math
A newborn blue whale gains 200 lbs per day (9 lbs. per hour) by drinking up to 50 gallons of milk each day. In one day, a blue whale calf would drink the amount of milk in 800 school-sized milk cartons! Have students rinse and save milk cartons each day. Count the new ones daily and add the total to the previous day’s total until you reach 800.
How Many Legs?
Post pictures of an octopus, a seastar, a crab, and a gull. Review as a class the number of legs each animal has, and discuss the ways each animal’s legs help it to survive. Next challenge students with addition problems, such as: How many legs would there be if we had added the legs of the octopus and the gull? The seastar and the crab?
Language Arts
What Do You See?
Students view several pictures of beach/ocean wildlife, then choose one to study. After examining closely, each student writes a description of his/her animal. Later, teacher reads written description and class guesses which animal picture it was based on.
World Music
You and your students can listen to, discuss, learn the lyrics and sing along with international artists of world music. Johnny Clegg and Savuka, Raffi, Peter Gabriel, Midnight Oil, Sting (song composed in the video, Spaceship Earth), Julian Lennon (“Salt Water Tear”) and Paul Simon (“Boy in the Bubble”) are only a few. Kid’s Eye View of the Environment, presented by Michael Mish, is a delightful audio cassette with clever lyrics and catchy melodies that will make everyone want to sing and dance. — TPE
Fine Arts
Be a Tree
Have students identify characteristics of trees. Visit trees in a back yard, in an orchard, in a park, or in the school year.
Have the students do tree dramatizations, using their arms as the branches and their legs as the trunk. How does the tree look during a storm? How does a fruit tree look in the spring? How does a young tree look in comparison with an old tree? What would happen to change the tree in different kinds of weather or during the different seasons?
After feeling what it might be like to be a tree, have the students paint pictures of them. — EGO
GRADES
3-5
Science
Evaluating Growth
Growing plants in crowded and uncrowded situations will show the effects of overpopulation. Fill milk cartons about three-fourths full of soil. Plant several cartons with seeds — some with two or three seeds, several cartons with a small handful and several cartons with a large handful. Varying the amounts of seed in the different cartons creates different conditions under which the plants will grow. After the seeds have become seedlings, measure and record their heights on a piece of paper and draw a line graph on graph paper to represent each group of seedlings. Evaluate the plants’ growth periods in terms of the number of plants under the different conditions. —CTE
Social Studies
Pick a Package, Any Package
Visit a supermarket and find the following products: cereal, laundry soap, milk, fruit juice, vegetables, soup, cake mixes, spices, candy, and toothpaste. In what different kinds of packages can they be bought? Are they available in the bulk food section? Why are products available in so many different packages? Which packages have the least amount of throw-away packaging? Which packages cost the least for each product? Which one does your family usually buy? Back in class, make a wall chart. Can some of the packages be reduced or avoided, reused or recycled? Circle in green all the reusable items, in yellow all the recyclable items, and in red all the disposables. -NTW
Non-Pointing the Finger
Take a walking tour of the neighborhood. List possible examples of non-point source pollution, both natural and human-caused. Back in the classroom, compile a class list to see how many sources were pin- “pointed.” Use magazine or newspaper pictures to make an informational display of possible sources of non-point water pollution. — FSS
Mathematics
Milk Carton Madness
In an attempt to determine how much potential space milk cartons take up in a landfill, students measure and calculate the volume of one milk carton. Students also determine the volume of their classroom. Using the milk carton volume figures, have the students determine how many cartons it would take to fill up their classroom. Then determine how many milk cartons are generated by the entire school in one day. Determine how long it would take to fill up their classroom. Extend these computations to a volume the size of the school. Follow this by discussing the importance of diversion of materials from the landfill and by exploring the feasibility of milk carton recycling at your school. — TGP
Language Arts
Wet Words
How important is water to our society? Just think how many different words we have to express it. Have students brainstorm words that mean water or a form of water (e.g., splash, drip, etc.) while the teacher lists them on a large sheet of butcher paper. Can your class reach one hundred? Save the list and use it later for creative writing activities.
Fine Arts
Water Drop Necklaces
Give each student a sheet of paper onto which a large water drop has already been drawn on both sides. On one side of the paper, printed inside the water drop are the words, “I’M TOXIC, DON’T FLUSH ME.” On the reverse side of the paper, inside the water drop are written the words, “WATER IS PRECIOUS, AS PRECIOUS AS…” Instruct students to draw one or several toxic items that should not be flushed down the toilet (e.g., paint, oil, chemicals) inside the water drop on the “toxic” side of the paper. On the other side instruct them to draw pictures of one or more persons or items that are precious to them (e.g., grandma, grandpa, a pet, a bicycle).
Once the drawings are completed, have the students cut out the water drop, then punch a hold near the top of the drop using a paper punch and finally thread a string of yarn through the hole to create a necklace. The necklace has a positive “precious” side and a negative “toxic” side depicted by the students’ drawings. — CON
Torn Paper Art
To help the students understand the fibrous make up of paper, tear a scrap of paper and hold one of the torn edges up to the light. Along that edge will appear a slight fuzz. Here and there tiny strands will project separately, like fine hairs. These strands are cellulose fibers.
Discuss with the children all the different materials from which fibers can be harvested to make paper. Show them fibers from a small piece of cloth to illustrate the point.
Using scraps of construction paper, tear and glue different colors to represent the forest and creatures who depend on the forest for survival. Display these pictures throughout the school to heighten awareness of the need to conserve and protect natural resources. – CON
GRADES
6-8
Science
Adopt a Part of Nature
Adopt part of a stream, creek, river, lake or ocean. Clean up the beaches or shores and spend time there as a class enjoying these special places.
Shorebird Safari
After introducing the class to common shorebirds and the field marks used to identify them, take your class to a beach. Shorebirds are visible year round, especially as the tide goes out. Students should try to identify special adaptations the birds have and predict the type of food they are seeking.
Social Studies
Nature’s Tool Box
Pass out to individuals or small groups of students an assortment of simple tools: paper clips, sewing needle, letter opener, hair brush, straight pin, comb, and so on. Have students examine the tools carefully and decide what kinds of natural objects could be used or modified to make them. After students hike through an outdoor setting and collect materials, have them use the materials to make specific tools. —EGO
Travel Log
Design a travel log to show the travelling you do for two weeks. Include the date, where you went, how you travelled, who went with you, how long it took and how many kilometres you travelled round trip. After two weeks, add up how many trips you took by car, transit, bicycle, foot, taxi or other modes. How many kilometres did you travel all together? Which transportation mode is the fastest? The cheapest? Which is you preferred transportation mode for each type of trip? Why?
Now analyze your information and make suggestions as to how you could have reduced the number of trips you made. How many times could you have used transportation other than a car? Compare your results with those of your friends. —LCA
Mathematics
Graph the Tide
Purchase a tide table wherever fishing supplies are sold. Enlarge and photocopy each month’s chart on a separate page. Make enough copies so that each student will have one month to chart on graph paper. Post the papers in a line along the wall to see the rise and fall of the tide for the year. Teacher may want to designate a place on the paper for the base point (0.0).
Language Arts
Opposites Attract
Here is a thought-provoking idea: Collect photographs, illustrations and/or paintings from magazines — some that graphically portray a healthy, balanced environment and others that depict a damaged, unhealthy Earth. Hang these on opposite walls in the classroom to stimulate discussion and inspire writing. How does each set of images make students feel? Encourage them to think about how the healthy can be changed into the damaged and how they can help to change the damaged back into the healthy. As students learn about environmental problems and the solutions, they may go to the appropriate sides of the room to record their thoughts and ideas in two separate notebooks. For example, if a student is studying about an extinct animal, that student may record his/her concerns in a notebook located next to the unhealthy Earth artwork. If he/she knows of possible solutions and actions that can be done to help, they may be recorded on the other side of the room next to the healthy Earth artwork. Eventually, your class will have two useful notebooks filled with concerns and solutions to many environmental problems. Prioritize these and use your computer to record the top ten items that can be posted in the room for reference and distributed to family members. – TPE
Fine Arts
Touch of Color
While visiting a wooded area, pass out paper to the class and have each student, using natural materials (soil, berries, flowers, leaves, moss), draw a picture of the forest setting. Give the class an opportunity to display their work and describe their feelings about the surroundings. Encourage the students to discuss what materials were used to add color. —EGO
GRADES
9-12
Science
Symbiosis
Working with a partner, students research symbiotic relationships amongst intertidal and ocean organisms and choose one to report on. One example would be the anemone and the clownfish.
Human-created Habitats
Assign one water-dwelling animal to each student or team. Students then must design (on paper) an artificial habitat which would suite the living requirements of the animal. To do so, they must investigate and establish the characteristics of the animal’s natural habitat, including food, water, shelter, space, climate, etc. This assignment could be followed by creating models of artificial habitats.
Social Studies
Environmental Careers
Plan an Environmental Careers Day. Research various careers associated with the environment and invite people in to speak about their jobs. Try to get a variety of speakers to reflect the diversity of careers and educational requirements. Prepare an outline for the speakers to they will address the questions you are most interested in.
Both Sides Now
A forest management specialist, touring a watershed area, notes that in one part of the forest many diseased trees have fallen and are covering the ground. This is a serious fire hazard for the forest. The specialist recommends logging this area and replanting with young, healthy seedlings. A concerned citizen’s group protests the logging, saying that clearcutting the area will erode the soil, which will make our drinking water unclean.
Your group has been asked to list the pros and cons of logging that area of the watershed. Consider the environmental, economic and social arguments. Can you find a compromise to the problem? How do personal opinions affect your decision? —FSS
Litter Lifelines
Students collect litter in an outdoor setting — school parking lot, playground, camp, or business district. Then each student selects a piece of trash – soda can, chewing gum wrapper, potato chip bag —and makes a life line of the litter, from the origin of its natural materials to its present state. — TGP
Mathematics
Food Chain Figuring
Use the following information to create math problems. A medium-sized whale needs four hundred billion diatoms to sustain it for a few hours! The whale eats a ton of herring, about 5,000 of them. Each herring may have about 6,500 small crustaceans in its stomach, and each crustacean may contain 130,000 diatoms…
Language Arts
Legends of the Sea
Many cultures have legends about the way the ocean and its life forms were created. Read some of these to the class, then encourage them to create their own legends about how somethings came to be. It would be helpful to have some pictures of marine life forms for the students to view. Some ideas: How the Eel Became Electric; Why Octopi Have Only Eight Arms; Before Whales could Swim; How the Hermit Crab Lost His Shell.
Fine Arts
Environmental Art
Visit a natural history museum. Or, have students look through books with photographs of paintings depicting the environment. They may analyze, discuss, compare, contrast art works and give critiques. Pupils may be inspired to write poems or stories about ideas generated from the special works and they may then create their own works of art.
Sources of Activities:
EGO- Education Goes Outdoors, Addison-Wesley 1986.
CON – Connections: Life Cycle Kinesthetic Learning. The Energy Office, Grand Junction, CO 1993.
CTE – Consider the Earth by Julie M. Gates, Teacher Ideas Press, 1989.
FSS – From Source to Sea, Greater Vancouver Regional District 1993.
GGC – Growing Greener Cities and Environmental Education Guide
American Forests, Washington DC 1992
LCA – Let’s Clean the Air, Greater Vancouver Regional District 1993.
NTW – No Time to Waste, Greater Vancouver Regional District 1993.
TPE – The Private Eye, Kerry Ruef, The Private Eye Project, Seattle, 1992.
by editor | May 16, 2017 | K-12 Activities
By Margie Klein
Retired Interpretive Naturalist
Now doing environmental ed. and nature interpretation part-time at local public lands sites. She is also a writer and author of many articles in national magazines; co-author of a nation-wide curriculum; recipient of an award from a national professional society.
ANIMAL TOTEM ACTIVITY
Supplies
– Animal totem cards
– Note paper, pens or pencils
– Construction paper, scissors
– Markers or crayons
– Tape and glue
– Craft sticks and decorations
– Long sheet of butcher paper
– Ball of yarn
An Introduction to Totems
A totem is any being which watches over or assists a group of people. The concept is not limited
to Native American Culture, and can be found in cultures around the world, including Africa and China. Usually an animal is chosen as a totem for a clan. The totem has been used to identify tribes, for group pride, and for protection. In more recent times, individual totemism has become popular – that is, “adopting” an animal that a person believes to represent favorable traits of their own, either in behavior or appearance.
Totem animals show us how humans relate to nature. They are usually chosen for the qualities they represent. When choosing one, the individual has to become introspective, and look at all their behavior tendencies. Sometimes an animal is chosen for qualities that the individual would like to have. Totem animals can also be chosen for the way they look, or the place that they live.
Once a totem is chosen, it is used as a symbol of self. The purpose is to visualize the animal and its place in the environment in order to connect to a higher level of consciousness. The individual may ponder how the animal would react in a certain situation, similar to one that they are experiencing. In this way, the totem animal provides assistance.
A totem may be displayed at home, work, or school, as a reminder to quiet the mind and acknowledge self-confidence. Totems can be combined to show the diversity of community. This works especially well in classroom settings. Students will be able to discuss the relationships in both natural and human communities. It’s an ancient wisdom that important life lessons can be learned for nature. And through totem activities, respect for nature is achieved. Making a totem
is also a great artistic outlet. Children’s’ imaginations can fuel the creative representation of totems. More than anything else, the making of a totem is useful as a teaching tool, getting the children to inquire and think.
Totem cards can be obtained from a number of different sources. Some card decks come with a book on totem animals (see references below). Or you can check Native American or alternative gift shops for “medicine cards.” You can also obtain cards with animal depictions from most
nature – oriented retailers.
How do you find your totem?
Have the students answer these questions, and jot down their answers on their notepad.
1. What animal are you attracted to or interested in? Why? (Color, fur, scales, etc.)
2. Have you seen a TV show or movie about an animal that you liked?
3. When you go to the zoo, what animals are you most interested in seeing?
4. What animals do you see most often outside?
5. What animal do you hope to see when out in nature?
6. Do you ever have dreams about certain animals?
7. Have you ever tried to be friends with an animal?
8. What animal frightens you?
9. What animal traits do you like in certain animals? What traits are similar to your own?
10. How do you wish that you could be similar to an animal?
11. Is there an animal that you like to draw, write about, or talk about?
You may wish to take the children on a field trip to a nature center, a park, or even an art museum. Inspiration can be found in many places, from real-life animal sightings to taxidermy specimens or beautiful paintings. Don’t forget that animals can be mammals, birds, fish, reptiles, amphibians and insects.
The children should be able to come up with an animal that they can relate to. Then ask the students to make a drawing of their favorite / totem animal. Ask them to draw the things that would usually be around that animal.
Examples of animal attributes
For reference, listed below are some of the better known animals that could be used for a totem project, along with the traits that are most commonly associated with them.
– Bear – strength, contemplation
– Beaver – busyness, working with others
– Buffalo – abundance, thankfulness for gifts
– Cougar – leadership, confidence
– Deer – gentleness, love, caring
– Dog – loyalty, a protector
– Eagle – spirit, healing
– Hawk – power of observation, informing others
– Horse – power, achievement
– Owl – wisdom, truth
– Squirrel – planning, gathering
– Swan – change, grace
– Turtle – nature, creativity
– Whale – rhythm, history
– Wolf – teaching, sharing knowledge
Making your totem
Have the children draw their totem animal on construction paper and cut it out. They should choose a color that is appropriate for the animal, then draw with markers or crayons to add detail to their animal. They can put their name on it, and things about the animal that they like, or the way the animal makes them feel. They can also be decorated with any number of craft decorations to give them more character.
Wrapping it up
Go around the room and ask each child to tell about their totem. Some children may have more than one totem animal. Ask them how the animals could work together.
As a class project, construct a totem pole made out of all the children’s’ totem animals. Paste it on the wall for all to see.
A variation for younger children is to make totem face masks out of construction paper, then glue a craft stick to the bottom for a handle. Instruct the children to have a “procession of animals,” acting out how the animal would behave.
Another project could be to lay out a long piece of butcher paper and have the children make simple drawings of their animals for a “petroglyph wall.” They would be so proud to have their artwork displayed in a school hallway!
Taking it one step further: Science and ecology
Create a wildlife food web, utilizing the totem animals that the children have chosen. Hopefully, you will have animals that show predator – prey relationships. You may even have a scavenger animal, better called a recycler! Of course you will have to add the elements: light, air, soil and water, as well as a few plants. The teacher could represent any or all of these last items. With a large ball of yarn, connect the elements and the plants to the animals that are herbivores or are prey to other animals. These animals then need to be connected to the predatory animals. Finally, if you have one present, connect the predators to a recycler. Now, “remove” one animal
from the web by having the child sit down. The pull that everyone feels on the yarn shows how all things in nature are connected. What happens if many of the animals are removed?
Taking it one step further: language and fine arts
Ask each child to come up with a short story about their totem animal. Have them write it down, and then find a way to demonstrate it. This could be with a painting, or a theatrical presentation. Let them be creative.
Taking it one step further: civics
Have older students contrast and compare the animals that they have chosen as their totems. Are there similarities? Differences? Why might this be?
How could all the totem animals make up a community? How would they work together, using their individual traits? Would it be beneficial to have these animals all together in a small community? What problems might be seen?
Finally, ask the students to use their totem community as an example for the real community they live in. How are all people the same? How are they different? How can everyone work together to make a better place?
References
Medicine Cards: The Discovery of Power Through the Ways of Animals (book + cards)
by Jamie Sams, David Carson, Angela C. Werneke
Keepers of the Animals: Native American Stories and Wildlife Activities for Children (book)
by Michael J. Caduto, Joseph Bruchac
Celtic Totem Animals (book + cards)
by John Matthews
Animal Speak: The Spiritual & Magical Powers of Creatures Great & Small (book)
by Ted Andrews

by editor | Feb 22, 2017 | K-12 Activities
50+ Simple EE Activities Across the K-12 Curriculum
GRADES
K-2
SCIENCE
Back to the Earth
Display food items such as a boiled egg, apple, peanut butter, bread, jelly, strip of bacon, etc. Pictures can be used. Ask students to identify the food items you have on display. As the students respond, ask them to tell what their favorite food is. From answers they give, let them trace two or three through their many forms back to the soil. Example:
apple -tree-seed-soil
peanut butter-store-factory-peanuts-plant-soil
jelly-store-factory-berries-plant-soil
orange juice-store-factory-oranges-tree-seed-soil
As a follow-up, provide each student with drawing paper and crayons. Ask them to draw a series of pictures showing each step of the cycle of a product from its soil origin to the consumer. Post representative products on bulletin board.
Snail Spell
Read Snail Spell by Joanne Ryder. Have the students fantasize “shrinking” to the size of an insect and write a descriptive paragraph, of their experience.
Flannel Beach Life
Cut out pictures of intertidal animals from calendars or a cheap field guide. Laminate pictures and use stick-on velcro to turn them into flannel board creatures. (You can also purchase a set of flannel patterns from the Seattle Aquarium). Use the flannel board to introduce the intertidal animals. If possible, have students act out the movements of each, for example, pretend to be anemones and wave arms as tentacles during high tide, cover up tight at low tide.
Garbage Gardens
Have students bring in an egg carton and empty halved egg shells from six eggs. Pierce the bottom of the egg shells and fill them with composted soil. Place the egg shells in the egg carton to keep upright. Plant various types of seeds in the egg shells. Make sure to label each student’s egg carton with their names and the types of seeds they planted. Extend the learning by creating experiments dealing with the effects of natural environmental variations such as light and water as well as “artificial” variations including the application of household hazardous wastes found in the classroom (check out areas around your sink for these products). — TGP
SOCIAL STUDIES
Nautical Neighbors
If there is a marina area, take the class on a tour of it. Arrange a tour of a fishing boat, and have the skipper explain all the different equipment and the variety of jobs aboard the craft.
Seafood Survey
Many cultures depend heavily on food from the sea for their sustenance. Have students survey family members and friends about the types of seafood they like to eat. This can be graphed on the chalkboard as well. Follow up survey with a visit to a local fish market or grocery to look at varieties of fish and shell fish up close.
Getting Down to Basics
List all the items below on the chalkboard. Then ask students, one at a time, to erase something that could harm the environment.
Beds, foam cups, what, war, polio shots, oil, atom bomb, pine trees, friends, sneakers, car, hairspray, vegetables, television, plastics, hamburgers, gold, food coloring, love, lawnmower, oxygen, zippers, flowers, aspirin, rockets, ice cream, water, candy bar, computers, grass, chemical fertilizers, jets, school, mosquitoes, boom boxes.
Add to this list. Have students explain their reasoning. — KT
MATHEMATICS
Whale Milk Math
A newborn blue whale gains 200 lbs per day (9 lbs. per hour) by drinking up to 50 gallons of milk each day. In one day, a blue whale calf would drink the amount of milk in 800 school-sized milk cartons! Have students rinse and save milk cartons each day. Count the new ones daily and add the total to the previous day’s total until you reach 800.
How Many Legs?
Post pictures of an octopus, a seastar, a crab, and a gull. Review as a class the number of legs each animal has, and discuss the ways each animal’s legs help it to survive. Next challenge students with addition problems, such as: How many legs would there be if we had added the legs of the octopus and the gull? The seastar and the crab?
Geometric Shapes in Nature
Geometric shapes can be found in twigs, rocks, leaves, insects, and feathers. Look for cubes, cylinders, pyramids, cones, ovals, spheres, spirals, etc. have students put specimens in like piles. Variation: Human-made shapes. Triangles, squares, dcircles, rectangles, etc., can be found at school in sidewalks, buildings, clothing.
LANGUAGE ARTS
What Do You See?
Students view several pictures of beach/ocean wildlife, then choose one to study. After examining closely, each student writes a description of his/her animal. Later, teacher reads written description and class guesses which animal picture it was based on.
World Music
You and your students can listen to, discuss, learn the lyrics and sing along with international artists of world music. Johnny Clegg and Savuka, Raffi, Peter Gabriel, Midnight Oil, Sting (song composed in the video, Spaceship Earth), Julian Lennon (“Salt Water Tear”) and Paul Simon (“Boy in the Bubble”) are only a few. Kid’s Eye View of the Environment, presented by Michael Mish, is a delightful audio cassette with clever lyrics and catchy melodies that will make everyone want to sing and dance. — TPE
Finding Adjectives
Give each child a small piece of paper with one or more adjectives that describe something in nature (e.g., smooth, slimy, triangular, expanded, cool, soft and green, round and gooey). Have students explore a natural area to find items that meet these descriptions. Let students take turns sharing what they found. —JOD
FINE ARTS
Be a Tree
Have students identify characteristics of trees. Visit trees in a back yard, in an orchard, in a park, or in the school year.
Have the students do tree dramatizations, using their arms as the branches and their legs as the trunk. How does the tree look during a storm? How does a fruit tree look in the spring? How does a young tree look in comparison with an old tree? What would happen to change the tree in different kinds of weather or during the different seasons?
After feeling what it might be like to be a tree, have the students paint pictures of them. — EGO
Make a Refracting Telescope
Use two small convext lenses, a toilet paper tube, cardboard, rubber cember, and paper.
1. Find the focal length of one of the lenses.
2. Cut a lens-size hole in the cardboard
3. Glue the lens over the hole.
4. Trace around the toilet paper tube with a pencil over the spot in the cardboard where the lens is located.
5. Cut on this line, and glue the cardboard-mounted lens in the end of the tube.
6. Wrap a sheet of paper around the tube.
7. Tape it in place.
8. Mount the other lens in the end of the paper tube.
9. Slide the tubes back and forth.
Natural Balance
Collect natural materials, or have students collect them. Suspend them with string under a crossbar of two sticks. Driftwood, acorns, and pine cones are among materials that are effectively used. Hang these in the classroom to brighten the scenery.
GRADES
3-5
SCIENCE
Evaluating Growth
Growing plants in crowded and uncrowded situations will show the effects of overpopulation. Fill milk cartons about three-fourths full of soil. Plant several cartons with seeds — some with two or three seeds, several cartons with a small handful and several cartons with a large handful. Varying the amounts of seed in the different cartons creates different conditions under which the plants will grow. After the seeds have become seedlings, measure and record their heights on a piece of paper and draw a line graph on graph paper to represent each group of seedlings. Evaluate the plants’ growth periods in terms of the number of plants under the different conditions. —CTE
Living in the Schoolyard
Teacher begins activity by drawing an outline of the classroom on the blackboard. Develop a key to one side of the outline to be used to represent the plants, animals and special features which exist in the classroom. “Let’s see if we can make a map of all the living things in our classroom. Does anyone see a plant? Skippy, will you come up and mark the plants on our map for us?
Then provide a map of the schoolyard for groups of students (or for individual students depending on skills at map making). Take children outside and let them map all the living things that they see. Remind them that they have to look hard to see some of the things that are there.
After students have completed their maps, gather them together for discussion about the roles of the living things they found.
Forest Community
Discuss as a group the items a city has and make a list. Suggestions include people, factories, subways, cemetery, apartments, treffic, plumbing, stores, garbage collectors, streets, etc.
Divide the group into smaller ones of 3 to 4 each. Send each group out in a forest or wooded area and have them try and identify the natural item that corresponds to the ones on the list. —ECO
SOCIAL STUDIES
Pick a Package, Any Package
Visit a supermarket and find the following products: cereal, laundry soap, milk, fruit juice, vegetables, soup, cake mixes, spices, candy, and toothpaste. In what different kinds of packages can they be bought? Are they available in the bulk food section? Why are products available in so many different packages? Which packages have the least amount of throw-away packaging? Which packages cost the least for each product? Which one does your family usually buy? Back in class, make a wall chart. Can some of the packages be reduced or avoided, reused or recycled? Circle in green all the reusable items, in yellow all the recyclable items, and in red all the disposables. -NTW
Non-Pointing the Finger
Take a walking tour of the neighborhood. List possible examples of non-point source pollution, both natural and human-caused. Back in the classroom, compile a class list to see how many sources were pin- “pointed.” Use magazine or newspaper pictures to make an informational display of possible sources of non-point water pollution. — FSS
Water, Water Everywhere…NOT!
Point out that last year water was rationed in parts of California. It was shut off altogether in parts of Rhode Island when a leaking gas station tank polluted it. Our carelessness can hurt the water supply. Also, it is important not to waste water if we want to be sure of having enough for our needs. Have students name some ways each of us can help protect our water supply. (Ideas include using less water, not running water needlessly, not littering near bodies of water. Also some environmentalists suggest eating less meat to save water. A vegetarian diet requires much less water in its production than is used in the raising of cattle, for example.) —KT
MATHEMATICS
Milk Carton Madness
In an attempt to determine how much potential space milk cartons take up in a landfill, students measure and calculate the volume of one milk carton. Students also determine the volume of their classroom. Using the milk carton volume figures, have the students determine how many cartons it would take to fill up their classroom. Then determine how many milk cartons are generated by the entire school in one day. Determine how long it would take to fill up their classroom. Extend these computations to a volume the size of the school. Follow this by discussing the importance of diversion of materials from the landfill and by exploring the feasibility of milk carton recycling at your school. — TGP
Shoot the Moon
Knowing that the moon returns to a given position every 29 1/2 days, have students figure out the dates that will have full moons for the coming calendar year. From this they can make their own calendars and check up on themselves. —JOD
LANGUAGE ARTS
Get Your Story Straight!
Invent or find a story that conveys an environmental message you wish to have your students think about. Divide the story into individual events that have ideas or words that allow the student to sequence them in a particular order.
As a group, or individually, have the students read the passages. Have the students number the passages so that the story can be read in the correct order.
Read the story aloud in the correct sequential order.
Use discussion and questioning to strengthen the story’s message. —IEEIC
Wet Words
How important is water to our society? Just think how many different words we have to express it. Have students brainstorm words that mean water or a form of water (e.g., splash, drip, etc.) while the teacher lists them on a large sheet of butcher paper. Can your class reach one hundred? Save the list and use it later for creative writing activities.
FINE ARTS
Wetlands Animal Masks
Students can create paper mache masks of their favorite wetlands creatures. Creative dramatics can be developed by students using their masks to play a role in a wetlands drama.
Students will need old newspapers, wallpaper paste or liquid starch, water, tempera or acrylic paint, round balloons, and scissors.
Choose a wetlands animal. Tear the newspaper into narrow strips. Blow up the balloon. Mix the wallpaper paste. Use one part wallpaper paste and 10 parts water or straight liquid starch.
Dip the strips of newspaper into the wallpaper and water mixture. Lay the paper over the balloon. Apply two layers to what will be the front of your mask. Let it dry completely.
Repeat procedure, building up the areas that will be noses, beaks, ears, etc. Let it dry completely.
Repeat the procedure, applying one last coat of paper over the entire mask. Let it dry completely.
Put the mask over your face. Feel where your eyes are. Have a friend mark the eye gently with a crayon or marker. Remove the mask and cut eyeholes. Put the mask over your face and check the eyeholes; remove it and make any corrections.
Cut a mouth hole.
Paint the mask and let it dry.
Water Drop Necklaces
Give each student a sheet of paper onto which a large water drop has already been drawn on both sides. On one side of the paper, printed inside the water drop are the words, “I’M TOXIC, DON’T FLUSH ME.” On the reverse side of the paper, inside the water drop are written the words, “WATER IS PRECIOUS, AS PRECIOUS AS…” Instruct students to draw one or several toxic items that should not be flushed down the toilet (e.g., paint, oil, chemicals) inside the water drop on the “toxic” side of the paper. On the other side instruct them to draw pictures of one or more persons or items that are precious to them (e.g., grandma, grandpa, a pet, a bicycle).
Once the drawings are completed, have the students cut out the water drop, then punch a hold near the top of the drop using a paper punch and finally thread a string of yarn through the hole to create a necklace. The necklace has a positive “precious” side and a negative “toxic” side depicted by the students’ drawings. — CON
Torn Paper Art
To help the students understand the fibrous make up of paper, tear a scrap of paper and hold one of the torn edges up to the light. Along that edge will appear a slight fuzz. Here and there tiny strands will project separately, like fine hairs. These strands are cellulose fibers.
Discuss with the children all the different materials from which fibers can be harvested to make paper. Show them fibers from a small piece of cloth to illustrate the point.
Using scraps of construction paper, tear and glue different colors to represent the forest and creatures who depend on the forest for survival. Display these pictures throughout the school to heighten awareness of the need to conserve and protect natural resources. – CON
GRADES
6-8
SCIENCE
Rainforest Pyramid
Use artistic talents to create blocks symbolizing rainforest creatures. Build a pyramid, putting the prey species such as insects at the bottom – building up until the top predators like the jaguar and harpy eagle are at the top. Show what happens when prey species are taken away – such as if insects are killed by pesticides, or small rodents are killed as pests. The same activity can be done for temperate forests of the Northwest as well, or any other particular ecosystem. —RC
Adopt a Part of Nature
Adopt part of a stream, creek, river, lake or ocean. Clean up the beaches or shores and spend time there as a class enjoying these special places.
Shorebird Safari
After introducing the class to common shorebirds and the field marks used to identify them, take your class to a beach. Shorebirds are visible year round, especially as the tide goes out. Students should try to identify special adaptations the birds have and predict the type of food they are seeking.
SOCIAL STUDIES
How Did They Do It?
Have students investigate the lifestyles of Native Americans on the prairie or along the coasts or in your local area. How were their needs met by these different environments?
Nature’s Tool Box
Pass out to individuals or small groups of students an assortment of simple tools: paper clips, sewing needle, letter opener, hair brush, straight pin, comb, and so on. Have students examine the tools carefully and decide what kinds of natural objects could be used or modified to make them. After students hike through an outdoor setting and collect materials, have them use the materials to make specific tools. —EGO
Travel Log
Design a travel log to show the travelling you do for two weeks. Include the date, where you went, how you travelled, who went with you, how long it took and how many kilometres you travelled round trip. After two weeks, add up how many trips you took by car, transit, bicycle, foot, taxi or other modes. How many kilometres did you travel all together? Which transportation mode is the fastest? The cheapest? Which is you preferred transportation mode for each type of trip? Why?
Now analyze your information and make suggestions as to how you could have reduced the number of trips you made. How many times could you have used transportation other than a car? Compare your results with those of your friends. —LCA
MATHEMATICS
Calculating Growth Rates
In 1990 the U.S. population was 248.71 million, in 1980 it was 226.54 million. If you need to determine the annual growth rate and doubline time from this information, use the following equation:
growth rate = (100÷number of years) x In (pop. 1990 ÷ pop. 1980)
To calculate natural log (In), you will need a calculator with an “In” key, which are available for under $20. The following is the series of keystrokes required to work out this example:
KEY DISPLAY READS
ON 0
248.71 248.71
divided by 248.71
226.54 226.54
= 1.0978635
In 0.0933660
x 0.0933660
100 100
divided by 9.336603
10 10
= 0.933660
Because of the uncertainty in the data, we will round this number up to 0.934. You now know that population in the U.S. increased between 1980 and 1990 at an average annual growth rate of 0.934 percent per year. Using the equation to determine doubling times (70 divided by the rate of growth), you can also figure out that the U.S. population at that continued growth rate will double in approximately 74 years. We cannot however, assume that the rate of growth will remain constant. The Immigration Law of 1990 for example, which increased immigration rates by 40%, will proportionately raise the U.S. population growth rate and thereby decrease the time it takes for our country to double its population. -CCN
Graph the Tide
Purchase a tide table wherever fishing supplies are sold. Enlarge and photocopy each month’s chart on a separate page. Make enough copies so that each student will have one month to chart on graph paper. Post the papers in a line along the wall to see the rise and fall of the tide for the year. Teacher may want to designate a place on the paper for the base point (0.0).
LANGUAGE ARTS
Opposites Attract
Here is a thought-provoking idea: Collect photographs, illustrations and/or paintings from magazines — some that graphically portray a healthy, balanced environment and others that depict a damaged, unhealthy Earth. Hang these on opposite walls in the classroom to stimulate discussion and inspire writing. How does each set of images make students feel? Encourage them to think about how the healthy can be changed into the damaged and how they can help to change the damaged back into the healthy. As students learn about environmental problems and the solutions, they may go to the appropriate sides of the room to record their thoughts and ideas in two separate notebooks. For example, if a student is studying about an extinct animal, that student may record his/her concerns in a notebook located next to the unhealthy Earth artwork. If he/she knows of possible solutions and actions that can be done to help, they may be recorded on the other side of the room next to the healthy Earth artwork. Eventually, your class will have two useful notebooks filled with concerns and solutions to many environmental problems. Prioritize these and use your computer to record the top ten items that can be posted in the room for reference and distributed to family members. – TPE
What’s the Idea?
Encourage students to be on the lookout for environmental articles in their magazine. Once they begin coming in, select one and duplicate as many as needed.
Distribute copies to students.
Instruct the students to read the selection very carefully. On a clean sheet of paper, or index card, they are to write the following:
• the main idea
• the problem
• a solution
• their personal opinion
• a summary (approximately eight sentences)
On the back they are to compose and write three quality questions with answers regarding the selection; one true-false, one multiple choice, and one fill-in-the-blank.
Collect papers and compose a comprehension quiz to distribute the next day, or perhaps create a game with which to exercise learned facts. — IEEIC
Expectations
Students can write a paper that expresses their feelings about going to outdoor schooll. By knowing their anxieties, fears, and excitement, you may be able to better understand their individual needs. It is always fun for students to reread their own papers upon returning home. —JOD
FINE ARTS
Touch of Color
While visiting a wooded area, pass out paper to the class and have each student, using natural materials (soil, berries, flowers, leaves, moss), draw a picture of the forest setting. Give the class an opportunity to display their work and describe their feelings about the surroundings. Encourage the students to discuss what materials were used to add color. —EGO
GRADES
9-12
SCIENCE
What Eats?
For one game, divide the group into teams, with no more than 10 persons on a team. How write a column of numbers one to 10 in three widely separated places in the room. Each team has a pice of chalk or marking device.
At a signal, the first person on each team dashes to the column of numbers and writes the name of a plant or an animal opposite the number “1”. Then he dashes back and gives the marker to the second person on his team. This person goes to the column and writes the name of something that eats what is written in number “1”. The marker is then passed to the third person, and so on down the line.
If a player writest down an incorrect name, it can be erased only by the next player, who loses his turn to write a name. Winners are determined by the most correct food-chain connections identified by a group.
Once a group has developed some skill at playing, try limiting the habitat to that of the forest, a brook, a marsh, a pond, the ocean, or some biome or community.
Symbiosis
Working with a partner, students research symbiotic relationships amongst intertidal and ocean organisms and choose one to report on. One example would be the anemone and the clownfish.
Human-created Habitats
Assign one water-dwelling animal to each student or team. Students then must design (on paper) an artificial habitat which would suite the living requirements of the animal. To do so, they must investigate and establish the characteristics of the animal’s natural habitat, including food, water, shelter, space, climate, etc. This assignment could be followed by creating models of artificial habitats.
SOCIAL STUDIES
Environmental Impact
Create a large mural on butcher paper of a natural area complete with wildlife, trees, mountains, rivers, etc. but no human development. After completing the mural, brainstorm a list of things that would happen if a much needed energy source (e.g., coal, oil, uranium, water) was discovered in that area. Draw pictures of these activities and facilities and place them in appropriate places on the mural. Discuss the positive and negative impacts the “new development” will have on the environment and wildlife, and create a list of these effects. Now, re-develop the energy source and see if you can come up with ways that the development can have less impact on the environment and still get the energy needed, at an affordable cost.
Move Over!
To begin this activity, tell your class they are going to try an experiment dealing with classroom arrangements. Don’t mention the idea of overpopulation or limited resources. These concepts will surface as the outcome of the activity.
Select an area of the classroom to be used in this overpopulation experiment. an area approximately 10’x10’ should be marked with masking tape on the floor and two desks should be placed inside the area. Also provide a “Resources Box” with 4 pencils, 2 pens, 6 sheets of paper and 1 pair of scissors.
Select two volunteers to work in the square. They should take with them only the books they will need. One half hour later, select two more students to work in the square and add their desks to the other two. (Make sure to remove all “resource” from the desks first).
Continue to add students to the area in shorter intervals of time similar to the way population grows rapidly. When the area can no longer hold additional desks, add students and have them share desks. Make sure the tasks the children are involved in will require the use of resources in the “Resources Box.”
When the limited resources and overcrowded conditions lead to bedlam, bring the class together for discussion. How is this like the real world? What “resources” are in short supply? —LLC
Environmental Careers
Plan an Environmental Careers Day. Research various careers associated with the environment and invite people in to speak about their jobs. Try to get a variety of speakers to reflect the diversity of careers and educational requirements. Prepare an outline for the speakers to they will address the questions you are most interested in.
Both Sides Now
A forest management specialist, touring a watershed area, notes that in one part of the forest many diseased trees have fallen and are covering the ground. This is a serious fire hazard for the forest. The specialist recommends logging this area and replanting with young, healthy seedlings. A concerned citizen’s group protests the logging, saying that clearcutting the area will erode the soil, which will make our drinking water unclean.
Your group has been asked to list the pros and cons of logging that area of the watershed. Consider the environmental, economic and social arguments. Can you find a compromise to the problem? How do personal opinions affect your decision? —FSS
Litter Lifelines
Students collect litter in an outdoor setting — school parking lot, playground, camp, or business district. Then each student selects a piece of trash – soda can, chewing gum wrapper, potato chip bag —and makes a life line of the litter, from the origin of its natural materials to its present state. — TGP
MATHEMATICS
Differential Absorption
Types of soils differ in the amount of water they can hold. Collect a standard amount of each of five or six soil types. Place each soil sample in a sieve held above a container. Pour a measured amount of water onto the soil and measure how much is collected after 30 seconds, one minute, 10 minutes. The amount of water the soil can hold is total added, minus that which drained out at the bottom.
From the data obtained, determine which of the soils can hold the most or the least water. On what properties of the soil does this depend? Which soils would erode most easily? Which would be best for plant growth? —ECO
Food Chain Figuring
Use the following information to create math problems. A medium-sized whale needs four hundred billion diatoms to sustain it for a few hours! The whale eats a ton of herring, about 5,000 of them. Each herring may have about 6,500 small crustaceans in its stomach, and each crustacean may contain 130,000 diatoms…
LANGUAGE ARTS
Operation: Water
Invite the participants to imagine that they have landed on Earth from another planet. The planet they come from only has minerals and air. They had received word that a substance had been found on Earth that could move or hold its shape. They are here to see if the report is true and discover for themselves what this “water” is like. They are equipped with finely tuned instruments for sound, feel, sight, smell, and taste. They are to split into two search parties, one going to the pond area, one to the stream. They have 15 minute to gather sounds, smells, signs of animal and plant life, observe water clarity, etc. The groups then discuss and compare the two water sightings and make speculations about the role of water on this green planet. Have students write an essay on their exploration of this strange planet and the miracle substance “water.” —JOD
Forest Essay
Have students write an imaginary story using one of the following titles: a) The Life of a Pencil; b)An Autobiography of a Tree from Seed to Lumber.
Legends of the Sea
Many cultures have legends about the way the ocean and its life forms were created. Read some of these to the class, then encourage them to create their own legends about how somethings came to be. It would be helpful to have some pictures of marine life forms for the students to view. Some ideas: How the Eel Became Electric; Why Octopi Have Only Eight Arms; Before Whales could Swim; How the Hermit Crab Lost His Shell.
FINE ARTS
Mother Earth
Students begin by brainstorming a list of all the ways they are dependent on the Earth. From that list should come some ideas for presenting that information to others. They may decide to have teams of students work on representing different items on the list. They may want to expres their relationship to the land written in story format, in poetry, verbally on tape, through photographs, drawings, paintings, or soft sculpture. They should come up with a theme uch as Native American philosophy, or a celebration of life-giving qualities of the Earth, or getting involved with conservation, and work from there. Ask for volunteers to write letters to local organizations requesting space to set up their display for others to view.
Encourage your students to express their feelings about our responsibility to live in harmony with the land. Is it our responsibility? Can the actions of one person make a difference? What kinds of actions does living in harmony with the Earth require? —LLC
Environmental Art
Visit a natural history museum. Or, have students look through books with photographs of paintings depicting the environment. They may analyze, discuss, compare, contrast art works and give critiques. Pupils may be inspired to write poems or stories about ideas generated from the special works and they may then create their own works of art.
Sources of activities:
CCN — Carrying Capacity Network Clearinghouse Bulletin, June 1992.
KT — Kind Teacher, Natl. Association for Humane and Environmental Education
IEEIC — Inegrating Environmental Education Into the Curriculum… Painlessly. National Educational Service, 1992.
RC — Rainforest Conservation, Rainforest Awareness Info. Network, 1992.
ECO — Eco-Acts: A Manual of Ecological Activities, Phyllis Ford, ed.
JOD — Just Open the Door, by Rich Gerston, Interstate Printers and Publishers, 1983.
LLC — Living Lightly in the City, Schlitz Audubon Center, 1984.
EGO- Education Goes Outdoors, Addison-Wesley 1986.
CON – Connections: Life Cycle Kinesthetic Learning. The Energy Office, Grand Junction, CO 1993.
CTE – Consider the Earth by Julie M. Gates, Teacher Ideas Press, 1989.
FSS – From Source to Sea, Greater Vancouver Regional District 1993.
GGC – Growing Greener Cities and Environmental Education Guide
American Forests, Washington DC 1992
LCA – Let’s Clean the Air, Greater Vancouver Regional District 1993.
NTW – No Time to Waste, Greater Vancouver Regional District 1993.
TPE – The Private Eye, Kerry Ruef, The Private Eye Project, Seattle, 1992.

by editor | Mar 25, 2015 | Conservation & Sustainability, Environmental Literacy
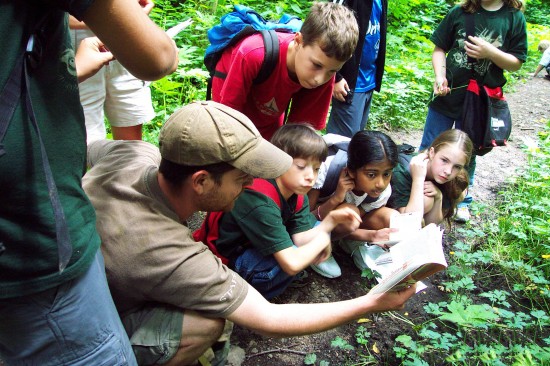
Creating the Need to Pay Attention
Field trips and adventures in the woods are tremendously important experiences for children, especially those students that don’t often get to spend time in a natural setting. Some of the most important, lasting results of good Environmental Education are the heartfelt connections that young people make with nature. They value the natural world because they have experienced first hand the beauty and magic of living ecological systems. To really feel this in a personal way, the kids have to go outside and experience it.
by Chris Laliberte
 he excitement of exploring outside with friends and classmates can turn a well behaved class into a pretty raucous crowd, and in all the commotion, it’s very easy for students to pay more attention to each other than to the woods around them. And while they might huddle up at each interpretive spot for a brief lesson or activity, what teacher or educator could possibly be there with each student for the whole walk, helping them learn from each moment as they explore the landscape with all their senses? The trick to making the entire outing an intense learning experience is to find ways to ensure that the students are invested in paying close attention the whole time.
“Tree Tag” is the classic example of creating a need to pay attention. Kids love to play tag, and they NEED a base, some place to avoid the tagger. So when base is whatever kind of tree the teacher calls out, the kids suddenly have a very real need to be able to identify trees correctly, so they can get to base. I love to watch what happens when kids disagree about correctly identifying trees, and they have to prove to each other what kind of tree it is. Tree Tag, however, illustrates a deeper point around creating need. A game of tag is a boisterous, wild, hectic thing. But remarkably, within this game is a fantastic heightening of awareness. The danger, the risk of being tagged, or the need to tag someone, is visceral. It creates physical and chemical responses in the body that affect awareness and the learning process. Adrenalated states provide a powerful opportunity for learning. Notice that this suggests an interesting point: in Tree Tag, the key dynamic for learning is the creation of a certain amount of anxiety, or a state of discomfort. This creates a very strong need to pay attention, and then the game focuses the heightened awareness onto something very detailed and specific — in this case, the differences in bark, leaf, branching pattern and color of different trees. By paying careful attention, the student can resolve the anxiety and get to someplace “safe.”
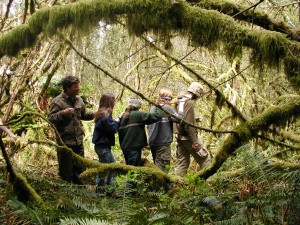 It’s a testament to the power of the adrenalated state that, more often than not, kids will leave base and venture back out into the fray on their own for another dose. Of course, some students will be reluctant to leave base, so the teacher can keep the game active by announcing that base is now a different kind of tree, and it starts again: more adrenaline, more awareness, more attention to details of different kinds of trees, more good learning about nature.
So how can this dynamic be harnessed so that it is present throughout the whole field trip? Here’s one method that has proved enormously powerful at Wilderness Awareness School. It’s called “Bird Language.”
The basic principle behind Bird Language is that birds love to gossip. They are constantly announcing to each other and the world around them just how they are feeling about their lives at that moment. It’s almost like a town crier who likes the job so much that s/he uses any excuse to make another public announcement. “The forest is calm and happy!” “The forest is still calm and happy!” But what birds love to talk about most of all is danger and peril. Anything that might possibly be a threat is immediately announced and pointed out. Jim Corbett, a famous tracker from India, once mentioned how puzzled he was that anyone could ever get eaten by a tiger. The birds and monkeys are so loud and aggressive in announcing the presence of any tiger, and even following along above it in the treetops, screaming out their warnings, that it seemed inconceivable to him that anyone could be taken unaware by a tiger in the jungle. By coming to understand Bird Language, students can learn to recognize all the movement and activity going on in the forest around them. They’ll know when raptors or other predators are moving through, or when animals like deer or raccoons are sneaking away.
Using Bird Language with your students starts with creating the need to pay attention to what the birds are saying. For some younger students, the possibility of seeing fairies or unicorns works wonders at getting them to listen for the announcements of the birds. This is especially good if students are already uncomfortable with being outside in the woods and need a little assurance. Our favorite strategy at Wilderness Awareness School is to set up the day so that students are hiking or exploring in small groups, and might at any time be ambushed by another group sneaking up on them. If you don’t have the ability to set up the ambush dynamic, or if the group is older and more callous to the woods, the classic anxiety here in the Pacific Northwest is the threat of the cougar. Wilderness Awareness School is very careful in using this particular set-up for bird language. We let students know that cougars are sneaky but cowardly hunters, who like to attack unseen and avoid a fight or struggle. To really help students feel the anxiety in a visceral way (like the threat of being tagged), you can describe the nerve endings in the canine teeth of the cougar that help it to feel just where to bite on your neck to cleanly sever the spinal column like scissors through a banana . Now, we are careful to point out that cougars don’t normally attack people. But they sometimes can’t help themselves when a really loud, obviously unaware, small, tasty looking person hurries by without paying any attention to the woods at all. But if you notice a cougar, and make yourself look tough, maybe yell at it, then the cougar won’t bother you. They’re really pretty timid once they’ve been found out.
Regardless of what strategy you use to create a need to pay attention, listening to Bird Language can provide the focus for your students’ heightened awareness, and will allow them to resolve their tension and anxiety appropriately. For if they are listening carefully to Bird Language, no cougar or group of kids will be able to sneak up on them without alarming the birds and giving itself away. Really accurate interpretation is a fine art, and requires a lot of practice sitting outside and investigating bird alarms, but mastery is not required for Bird Language to be a remarkably effective learning tool. Here are the basic details your students will need to know to be able to get started successfully:
 Bird Language: A Quick Summary
Pay closest attention to the small ground-feeding birds: Robins, Sparrows, Juncos, Wrens, Towhees, etc. They are the best sentries.
Learn to distinguish the Five Voices of the Birds. The first four Baseline Voices indicate that the forest is relatively comfortable, and therefore “in baseline.” The last voice, the alarm, indicates a threat, usually a predator, often a human.
1. The Song: Birds singing their characteristic celebration, they are often loud but the feeling is very comfortable.
2. Companion Calling: Birds in pairs or groups call back and forth to each other regularly, either with their voice or with body movements, just to let each other know that they are alright. Usually this is soft, quiet language. It can occasionally sound scolding if one bird gets out of sight from another and fails to respond quickly enough.
3. Juvenile Begging: Young hatchlings can make quite a racket demanding to be fed. This repetitive whining may sound obnoxious, but don’t mistake it for distress.
4. Territorial Aggression: Generally made by males, this is loud, aggressive language that can sound like alarms, but you’ll notice that it doesn’t bother other birds (females, or birds of other species).
5. The Alarm is dramatically different from the four baseline voices. While the baseline voices sound like someone happily whistling, the alarm sounds like someone yelling for help. Different species sound different, but they all sound terribly upset, worried and nervous, and you’ll find yourself feeling that way too, when you open yourself up to really listening receptively to birds.
Watch the body language of alarming birds:
1. Where does it go when it alarms?
Does it fly up higher into the branches, or down low to the ground? Ground-feeding birds are typically brown, so they like to be down low where they are camouflaged and hidden. The only reason they fly UP is if there’s a threat on the ground. They will fly just high enough to avoid the danger, so how high up they fly is a good indicator of how high the danger can reach. If they go down, it’s because they’ll be safer down low in the thick brush, so it’s either a raptor or a threat that can’t get into the bushes (like a human).
2. Does the bird fly up and then look back to where it came from as it alarms?
If so, it was scared out of its place by something close by on the ground. Does it fly up and look forward, or out and around? If so, it was probably startled by a sound or another bird’s alarm and it is looking for the danger. It usually looks towards the source of the alarm (remember, these birds often look sideways).
3. Does it just fly madly away alarming as it goes? If so, it has been “plowed” out of the area, quite likely by a human.
Those are the very basics of Bird Language; however, the most important aspect of all is the “Secret Lesson” that you don’t even talk about. By attending to bird alarms, students soon realize that they themselves are disturbing the “baseline” of the forest. One of the old sayings from Kenya that young kids heard constantly was “Never disturb a singing bird.” Once they notice that they are scaring all the birds away, they begin to work at not alarming birds, and the transformation that this causes is remarkable. Once oblivious, boisterous and unconnected kids turn into quiet, observant, and respectful participants in the ecological community. Listening to birds now becomes a fabulous tool to encourage heightened awareness and a phenomenal source for amazing close encounters with animals that they want to see, like elk, deer, foxes, and raccoons, because now the birds aren’t warning these animals of the approaching students five minutes before they arrive.
In Wilderness Awareness School’s experience, Bird Language works best initially as the focal point for new students who have been “set up” to pay attention by the cultivation of a state of discomfort, and quite literally gives students the awareness they need to be safe, aware and feel comfortable in the woods. Remember, it will take some time to establish this as a routine for your students. They’ll need plenty of reminders early on. The most effective one is simply “Ssshhh! What was that? Did you hear that alarm?” Above all, have fun with it! You’ll be amazed at the transformation Bird Language can work in your students if you just stick with it.
Chris Laliberte is the Program Director for Wilderness Awareness School, a national not-for-profit environmental education organization based in Duvall, WA which is “dedicated to caring for the earth and our children by fostering appreciation and understanding of nature, community and self,” on the web at http://www.WildernessAwareness.org
Resources for Bird Language Study
Audio:
The Language of the Birds and Advanced Bird Language: Reading the Concentric Rings of Nature, beginning and advanced audio series by Jon Young. Available at http://www.WildernessAwareness.org
Backyard Bird Walk and Marshland Bird Walk, and other recordings by Lang Elliott. Available at http://www.naturesound.com
Books:
Kamana One: Exploring Natural Mysteries, by Jon Young, part one of Wilderness Awareness School’s four-level independent study Kamana Naturalist Training Program. Includes bird language, tracking, wilderness living skills, traditional herbalism, and naturalist mentoring. Available at http://www.WildernessAwareness.org
Jungle Lore, by Jim Corbett. A powerful narrative from the Indian jungle which includes Bird Language lore.
Bird Tracks and Sign: A Guide to North American Species, a unique new resource for studying birds by Mark Elbroch , Eleanor Marks, and Diane C. Boreto.
A Guide to Bird Behavior, Vols. I,II, and III, by Donald and Lillian Stokes.
Peterson Field Guides: Western Birds, by Roger Tory Peterson.
Other:
A Birds World, permanent exhibit on Bird Language at the Boston Museum of Science. http://www.mos.org


