
by editor | Jun 13, 2014 | Schoolyard Classroom
Starting a Community-based Natural Resource Education Program

Strategies for Authentic Community Engagement
Authors Patrick Willis Oregon State University Extension 4-H Portland, Oregon
Susan Cross Environmental Educator Tucson, Arizona
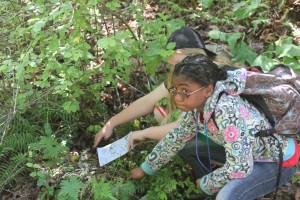
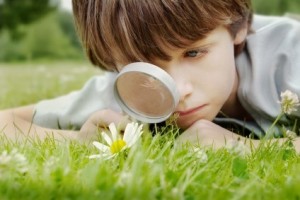
 lmost every school has a natural area very nearby. It could be that marshy place behind the school, the little stream or “ditch”, the unmowed field, or the patch of woods beside the parking lot. These natural areas are often overlooked as learning sites, or if they are recognized, they are not acted upon because we do not know exactly how to start using them. The intent of this article is to provide educators with a platform to begin natural resource programming at sites near their school. Philosophical as well as pragmatic information is shared to provide both intrinsic and conceptual connections for educators to engage youth in authentic community involvement in the natural resources. This information is intended to offer support, ideas, encouragement and new ways to think about what we do as educators. It is meant to inspire you and move you to action.
It is our hope that through programs that link schools with natural resource areas, citizen awareness and community involvement will increase. The vision is for schools to become vital resources for their communities and that students, through real world projects, become active participants in their society.
 Why connecting students with natural resource areas have educational benefits.
A strong connection to the larger world community starts with an intimate local understanding. Children can apply knowledge of systems and concepts learned in a personal experiential world to global problems. Once they grasp the value and function of the forest, wetland, grassland or watershed in their school backyard, it is a short step to awareness about other watersheds or wetlands that they see in their own community, or to a concern about global environmental issues they hear about in the media. A personal stake in the lives of their wood ducks, red-tailed hawks or metamorphosing moths becomes an intrinsic understanding of the richness present in all ecosystems. A program such as this taps the innate desire of children to care for their world and allows them to do just that: to help, to clean up, to make better homes for wildlife, to gather information to guide decision making. It empowers them at the local level and gives us all a much needed assurance that active informed citizens can and DO make a difference.
Students involved in active hands on programs also feel better about the way they are learning. The students report that they have more fun and feel like they are learning things that they didn’t know before. Teachers say that their students really retain more of what they learn and can apply the learning in other situations.
In these times of being overwhelmed by environmental problems on every front, it is easy for people to lose their sense of hope and to feel defeated in the face of such looming concerns. This can be especially hard on young people, who have been inundated since early childhood with the magnitude of our planet’s problems. Working with young people in settings where they can impact an area in a positive way is a powerful tool to help them realize the healing potential they have as caring human animals.
Getting Started
Many educators find the idea of starting a program such as this to be intimidating…And it can be!! Teachers already have heavy workloads. It often feels as though there isn’t enough time in the day to prepare for classes, grade the day’s papers and still get to eat lunch! The extra work required to implement an on-going, in the field/community program can indeed loom large in the picture and cause many people to give up before they even begin.
 Sites and Site Selection
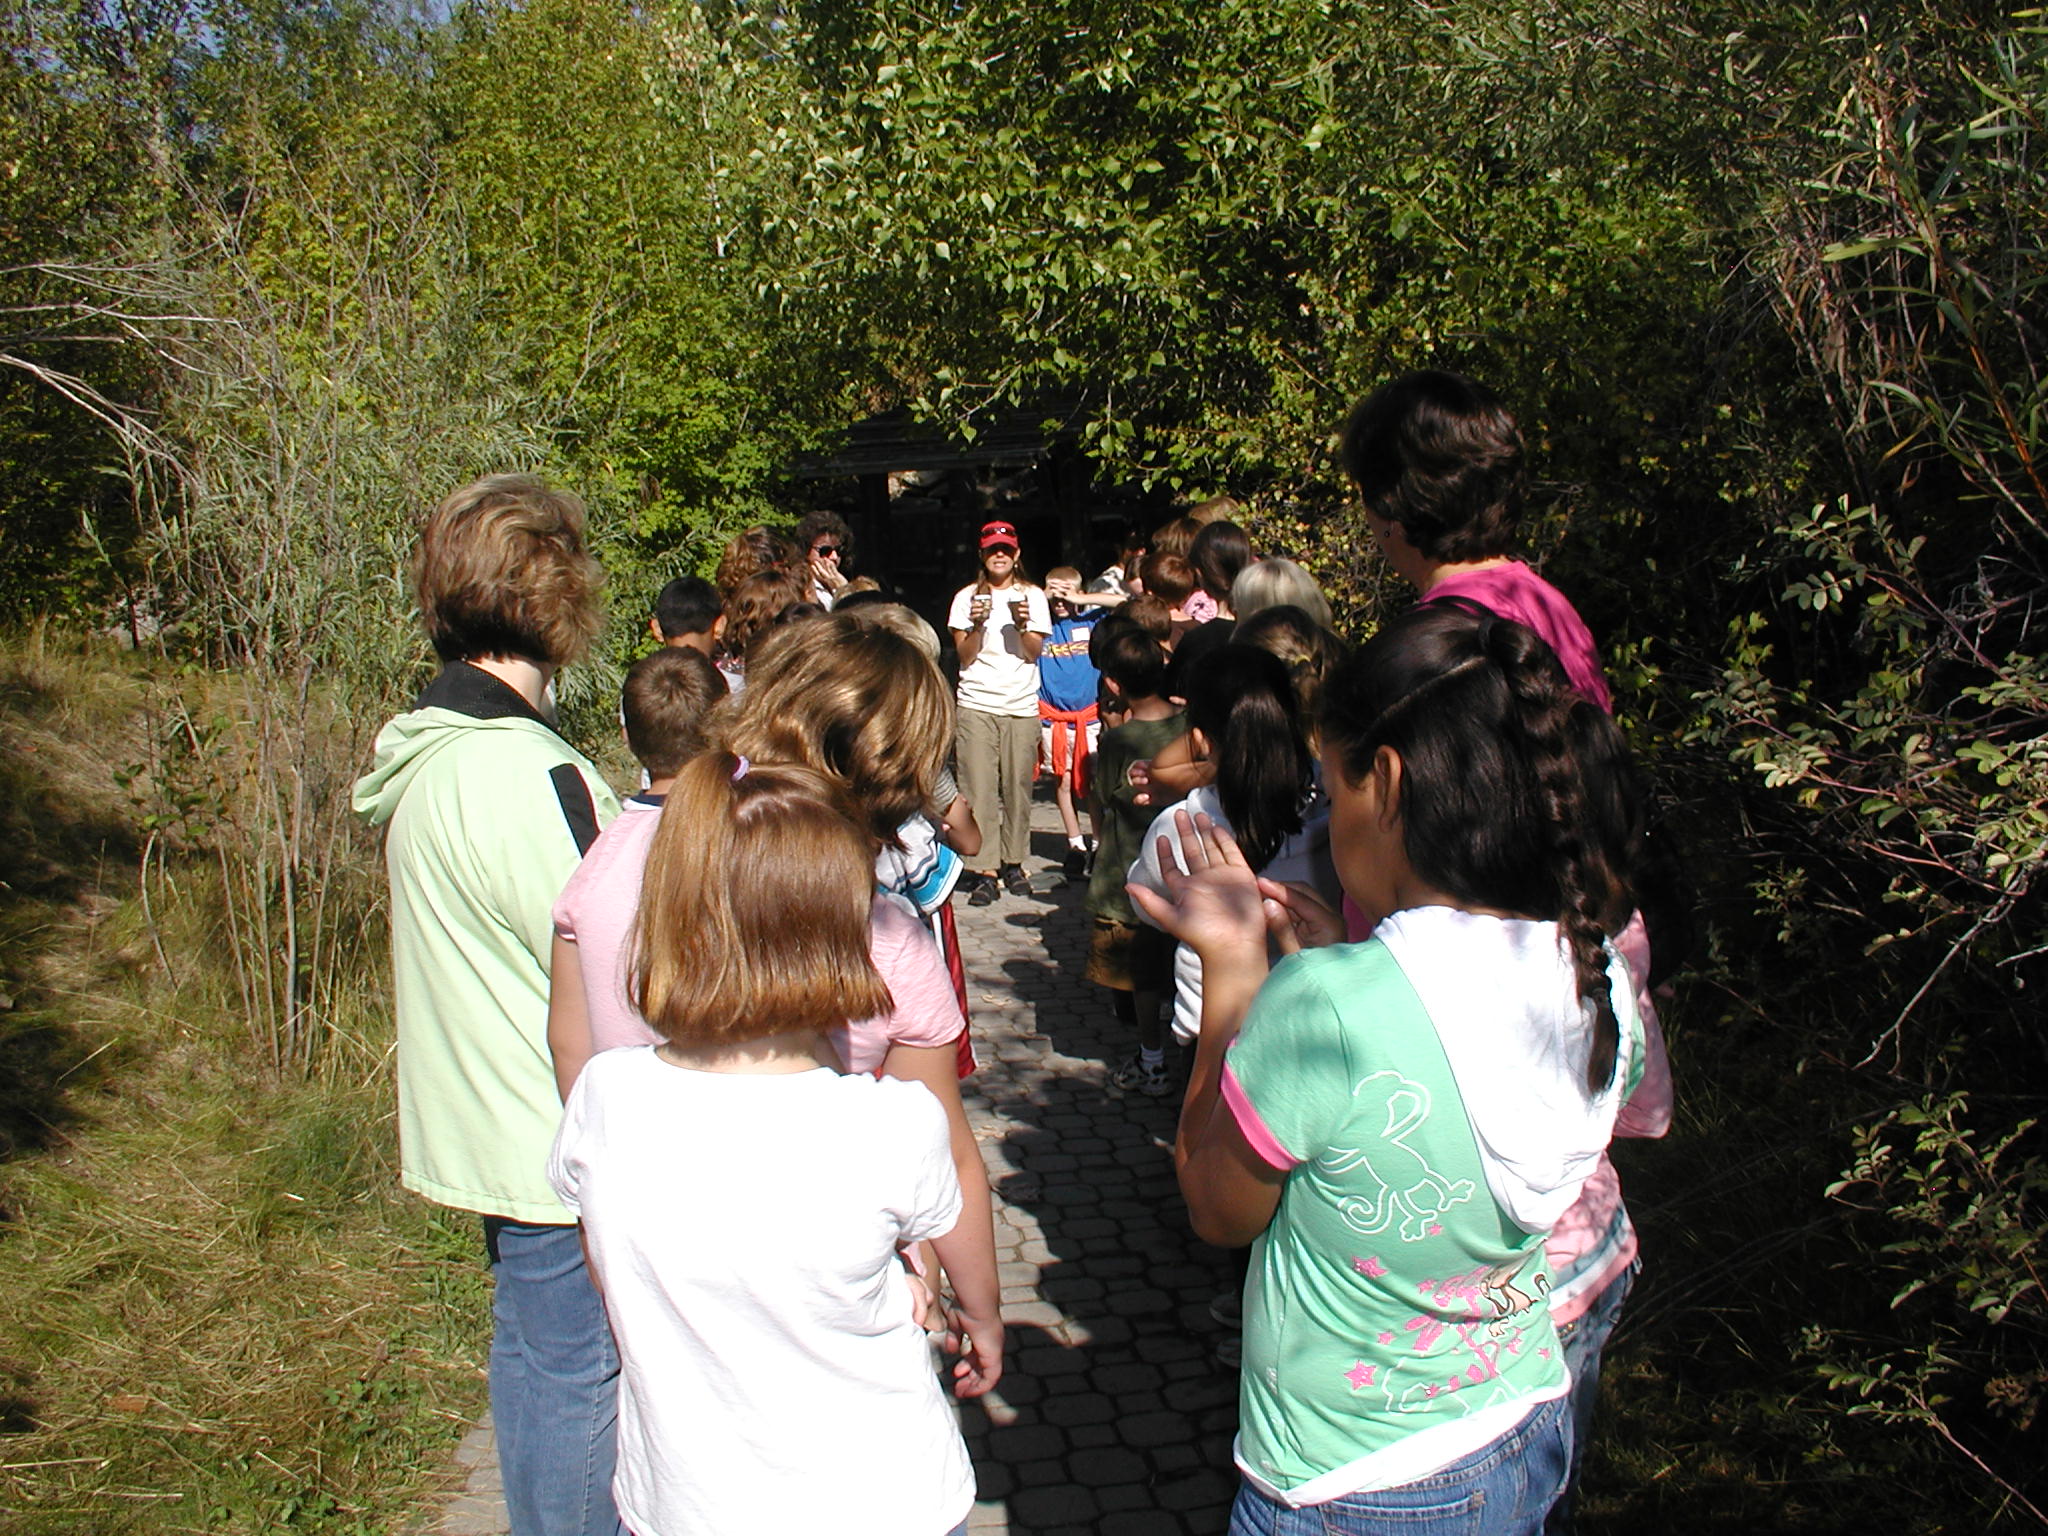
The initial step is to find a site around which to center your program. The site is an integral part of the program because it becomes the focal point for community involvement. Because of time limitations in our schools, the closer the site is to the school door the better. The site doesn’t need to be huge or elaborate. It can be the little ditch on the school grounds, it could be the marsh on private land across the street, it could be the little patch of forest left in an urban development, it could even be something that you restore or develop on your own school grounds. The ability to visit the site frequently outweighs any lack of “wildness.” In the reality of today’s shrinking school budgets, transportation money is drying up. A site within walking distance solves this problem, and makes all logistics easier.
After you determine what site or sites you may be able to use for your program you will need to find out as much as possible about the site. In an ideal situation, this entire process can be done by your students. You will want to find out who owns the property. Who is in charge of managing it? Can you use the site as a study center? Are there special things about the site? Is it a protected area? How will you minimize the impact of your student’s presence at the site? Get maps of the local area. Talk to homeowners associations and neighborhood businesses. Can you do enhancement work there? How could the site be improved for wildlife or educational uses? What kind of information would it be useful to have about the site? Who might best use that information? What is the history of the site? Are there any cultural values?
When you find out who is involved with your site you may be surprised to learn that those people need your student staff to collect information as much as you need them for their expertise. Some sites may be in private ownership and you may have to seek permission to use the land as a study site. This process in itself can be quite a learning experience for your students. Many schools are lucky enough to have natural areas on their own grounds, but you may still need permits to make changes. Each place has its own unique combination of political circumstances just as each place has its own unique natural character. Let the problems you encounter become learning challenges. Help your students learn about how the world outside the classroom operates. The problems you face will lead to the development of valuable life-long learning skills.
Willingness to Change Attitudes and Structures
Often the success of innovative programs depends on our ability to think in new ways. Change is never easy and is especially hard to create in institutional settings. It is difficult to envision new roles for ourselves and new shapes for our old models. With the momentum for educational change coming from the state level, the atmosphere for programs of this type is good, and you could be on the leading edge of this change. The watchword of the hour is flexibility.
 Changing Teacher Roles
In this kind of program the teachers may have to recreate the way they interact not only with their students but also with their peers and administrators. You may find yourself much more of a coordinator and learning manager than a deliverer of set curriculum. You may find that the most important function you can serve is finding access for your students to partnership opportunities with other adult instructors. You may spend your time locating project ideas, equipment and funds rather than directly teaching lessons. You may need to spend time on the phone coordinating an event or writing proposals to fund your program’s newsletter. It is not the role you are probably most familiar with and it can seem like a leap into the unknown. It can also lead to personal growth and a great deal of fulfillment as your program blossoms.
Changing Educational Models
Everyone involved in education agrees that our current model doesn’t seem to be working. Students are not entering the adult world prepared to meet the challenges of a rapidly changing and complex world. Demand for people who can work cooperatively, be self motivated learners and understand complex systems is growing in every field of endeavor. Schools somehow need to provide their students with opportunities to learn the skills of citizen action, exposing them to processes and systems both natural and social. Students need to have real world experiences with real world consequences. Programs such as this can offer those opportunities. Schools could be in the business of finding community needs that aren’t being met. Schools could become a resource for the community instead of being viewed as a drain on resources. The school, through a program, could provide opportunities for students to interact with their community and society using meaningful projects that need to be accomplished. A great deal of excitement and motivation builds around an idea when students are producing work for a real world audience with a real world purpose. Think of the schools as a pool of highly educated leaders with a large motivated work force that just needs to be focused and applied to the needs of the community!
The Time Issue
Time, or the feeling of never having enough time, is a stumbling block in the initiation of Community-based programs. How much time should be allocated for activities related to the project? How will the teachers involved find time to organize materials, field work and special events? Is one day each month enough field contact? Perhaps one day each week may be needed. How will this program fit in with music, social studies or math? Is a 45 minute period enough time to get out into the field, do a study, and then get back? All these time questions are quite valid and need to be explored. But our attitudes, those hidden assumptions behind our time feelings also need to be explored. How did our school day come to be fragmented into 40-45 minute blocks? Does it have to be that way? Can our scheduling be more flexible without a loss of quality?
Using a thematic or project based approach to interweave your Community-based program into several subject areas can increase the amount of time spent in the field or community. Math can serve to interpret collected field data. Art could be the designing of logos or signs for the site. Music could involve songs written about the area and performed at a school wide celebration. Pursuing permission to have use of a site, or to make changes at a site, could serve as lessons in political science. Keeping journals or producing an informative newsletter is a natural for writing and language.
You Don’t Need to be an Expert
A general fear many educators experience is that they will be asked about something they don’t know. When beginning a program that involves a natural resource area there will be tons of things you don’t know, and that will be part of the excitement. As teachers we have the feeling that we should always be able to answer every question like an expert; but we may want to consider that the “teacher-as-learner” may be a more powerful model than the “teacher-as-dispenser-of-all-knowledge”. Being able (and willing) to say, “I don’t know, but let’s see if we can find out,” is a virtue in an educator, not a sin. Think of the program as an opportunity for you and your students to learn about an ecosystem together. Curiosity, enthusiasm and access to good reference materials are far more important than teachers having all the specific information on a particular environment locked away in their brain.
Program Planning for Administration Support
Having the support of your administrator may allow you to arrange for time to do planning for and coordination of your program. With good administrative support and communication, substitute time may be possible for planning, attending development classes or for special field programming for your students. It is almost impossible for teachers to teach a regular load and to just add on another program. Realistically the teacher who takes on a project of this sort will need time and support from their school. Your formal proposal may give your administrator a powerful tool for acquiring a commitment from your school board or district for that extra time you will need.
Project Plan Outline
Another important part of beginning a program is the time spent early on in the planning phase. If you take the time to examine your hopes and limitations, to determine what your goals are and to commit those to paper, you will have come a very long way toward establishing something concrete to build the program on.
The proposal form (Figure 1) will help you create a document you can use to approach school administrators, fellow staff members, and potential partners. It will help you clarify your group’s goals and priorities. Your proposal form, or “white paper” describes the vision and who should participate, the benefits of participation, and the benefits to the community. In addition, the project plan often contains language very useful in future grant proposals. Whether your project is simple or complex, you and your group will benefit from taking the time to ask yourselves the questions contained in the form.

Community-based Program Strategies
You have a program proposal, you have administration support, there is building enthusiasm for the project…what do you do next? The following are tested and well established examples about how to generate and sustain interest in the program as it develops.
Create an Identity
Your students and others involved in the project will have much more ownership if the site you have chosen has a name or an identity. It is probably more powerful to have the students highly involved in the process of creating an image for the site rather than having an image imposed on them. You will want to guide them in coming up with an attractive logo that can be used on your future newsletters, correspondences, signs and t-shirts. You may want to consider letting people know what your purpose is in the construction of the name. Are you a resource center, a study center, a technology center, or something else? Is there some special plant, animal or geographic feature at your site that would make a good symbol or icon?
 Increase Community Contact
Support for your program will grow if people know about what you are doing. Cultivate a relationship with your local media. Let them know when your students will be out in the field, when you are putting up a sign to identify your site or have special activities planned. Your students can write and publish a website or a simple, informative newsletter about their involvement and successes. Invite partners and potential donors or other influential people in your community to observe what your students are doing. People often like to jump on the bandwagon of an interesting project and partnerships can develop from public knowledge of the program.
Create a Student Leadership Component in Planning
You can plan yourself silly, but if the project doesn’t have student ownership and support your plans will soon sink with apathy or resistance. Students need to feel like it is their program. They need to be active citizens in the process right from the beginning. Having student representation at the planning level will lend legitimacy to tasks proposed for students to accomplish. It can be a powerful growth experience for the students involved.
Spend Some Time on Aesthetics
If you think back to your own interest in the natural world it is usually linked very closely with a sense of place. Allow your students time in their special environment to observe the natural world in a holistic way. Love of the natural world doesn’t come from performing pH tests. It comes from watching spiders build their webs or resting in the sun in tall grasses and listening to a killdeer sing. Set up intentional aesthetic activities for your students early on in the program. You’ll end up with strong advocates for the site. Emotional responses to the environment are not irrational responses; and emotional ties to place are often the best motivations to action!
Approaching Resource People
Depending on your circumstances you may want to use resource people as special advisors or you may want to form partnerships with one or more of them that includes actually working on projects that they are involved with. Resource people as guest speakers in the classroom probably has limited value. If you can arrange for your students and staff members to work directly with resource people it can lead to much larger rewards for everyone. Because most resource people have many duties in their job descriptions, they are busy people. If you can approach them with detailed specific needs and directions about how they might help you with their expertise, their time will be used much more effectively.
Funding Ideas
Money always seems to be a limiting factor in program development, but don’t let a lack of funds discourage you. Many activities can be done without much money. Exploring and getting to know the site, doing plant and animal inventories, making maps, observations of seasonal changes or planning an awareness celebration for the school or community can all be accomplished with a minimum of funds.
Keeping the community and the media aware of your plans and goals can lead to opportunities for donations from businesses such as volunteers, money, equipment or supplies. Parent/Teacher organizations can be a source of funding as well as a source of volunteer helpers. Motivated students can also be excellent fund raisers using all those time proven school fund raising techniques. You and your students may also be able to come up with a product associated with your site such as t-shirts with a logo, wildlife art or photography from the site, or some other product or service. Cities or counties may be able to donate time or materials. Agencies sometimes have funding for plantings or restoration work. Cities and agencies may be able to provide tools and advice from staff people.
There is always the potential for grant writing as a source for funds. This approach to raising money is often available but comes with the fears of how to get started, who to ask, what to say and, of course, finding the time to write the grant. Another factor to consider is the fear of getting the grant. Most granting organizations require you to do what you promised in the grant! This is where your program plan becomes a valuable resource. A good plan is the first step in approaching a funding source. As for who to ask for funding, the list of possibilities can be overwhelming. Start with a few inquiries with local agencies and ask others who have written grants. Most people are very supportive and helpful. If you stay with a reasonable plan, your program will blossom with the assistance of a grant and not degrade into unfulfilled dreams.
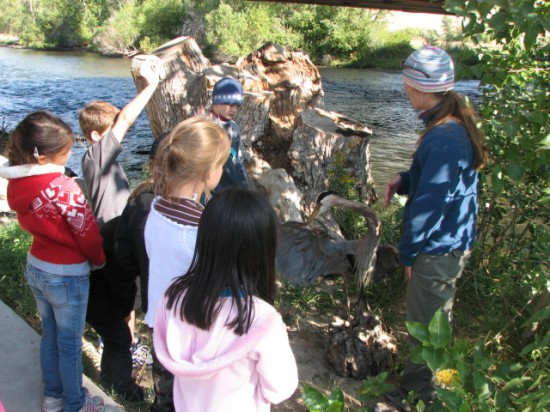
 Field Techniques
Many teachers feel uncomfortable taking their students outdoors. It is a much less structured setting and chaos can quickly ensue. A bad field experience can leave a leader longing for those wonderful rows of desks back in the building. Field study does require some special skills and planning, but the harvest you and your students reap is rich!
There are some risks being in the natural world, from twisted ankles to bee stings; but the possible rewards far outweigh the risks. Safety is an important concern in the field. Make sure you have a first aid kit with you and know what to do in an emergency. You may want to check on your school’s insurance policies for field settings. Many risk factors can be greatly reduced by explaining clearly to your students what your expectations are for behaviors in the field.
Setting the same kind of clear behavior expectations for the field as you have in your regular classroom is essential. Let students know that you have boundaries that they must respect, being sure to be clear about what areas are off limits and why. Have set work areas for each group. It is often easier to explain tasks and rules inside the normal classroom setting before you set off into the outdoors to do your field work.
Spending a bit of time on field ethics is a valuable thing. Students don’t automatically know that they need to be quiet, to not disturb plants and animals unnecessarily, or that horseplay is not acceptable. Most of the time when we allow students to be in the out of the classroom is for unstructured play. It takes some training to get the message across that outdoors doesn’t always mean recess.
Group size is another important factor in the success of field work. Small groups function much better than large groups. Have a job for everyone. Having tasks that keep the students focused brings the potential for misbehavior down. If you are the only leader, use a “hub” approach. Have a central location from which you disperse and gather your student work groups. It is also important to realize that not all students need to do everything. Often it is better to have students become the “experts” at a certain job or subject area and to share their findings and knowledge with the others.
Minimize Your Impact/Earth Ethics and Etiquette
One of your most important roles in the program is as a role model for student behavior. Your actions speak much louder than your words and children will treat the environment much the same way that you do. This can be an enormous opportunity to teach outdoor ethics without ever saying a word. Your decisions about collecting, the way you treat plants and animals in the environment, and what your expectations are for your student’s interaction with the site are all powerful messages about how to treat the planet. Children should be engaged in decisions about when, why and how to collect samples. Is it appropriate? Is it necessary? What valuable thing will we learn from the experience? Examine ways in which your visits impact the natural world. Are there ways that we can reduce those impacts and still learn the things we want to? How long lasting are our disturbances? Bringing these kinds of questions into the consciousness of your students will help them to form and examine their own beliefs on these issues.
Conclusion
Change will only come to our systems through the efforts of individuals. Though change is difficult and frightening, it is also empowering and growth producing. It is up to you to try things out, to experiment with ideas and to not be afraid of failure or of success. BE ALERT! This approach to student/citizen involvement can become a self-perpetuating system…a machine that may be difficult to stop once engaged!! Don’t be surprised when you become the center of excited interest emanating from your students, their parents, your colleagues and administrators! We owe it to our students and community to try!
Pat Willis is a distinguished environmental educator currently with Oregon State University Extension 4-H.
Susan Cross is a former EEAO member and Oregonian now living in Arizona.
by editor | Aug 24, 2013 | Schoolyard Classroom
by Jim Martin
CLEARING Associate Editor
 teacher has made a commitment to design and execute a unit which explores the curriculum embedded in a small creek at the edge of her schoolyard. She didn’t just decide, then go; instead, she visited the creek, became familiar with its parts, then drew on some information she had gleaned at a teachers’ conference to construct a basic plan for how the unit would work. The plan included elements like: Place students in work groups assigned a particular task, Identify and exploit the curricula embedded in the creek and its banks, and Use group reporting to bring all of the learnings to all students in the class.
Before moving on, let’s compare what she’s done so far with what the National Board for Professional Teaching Standards teacher certification program is looking for in teachers. Their vision of effective professional teaching is based upon five propositions:
1. Teachers are committed to students and their learning;
2. Teachers know the subjects they teach and how to teach those subjects to students;
3. Teachers are responsible for managing and monitoring student learning;
4. Teachers think systematically about their practice and learn from experience; and,
5. Teachers are members of learning communities.
Let’s look at each of these propositions from the standpoint of the work of this teacher, and that of another who teaches from the book, and is committed to teaching a particular publishers’ curricula. This other teacher knows that, at the least, her students will have covered what is on the standards tests, and how well they do on that is up to them. These two teachers’ approaches to teaching are interesting to me in that they embody a dichotomy of approaches to many aspects of being human, that I, and others, identify as hierarchical:individualistic vs. egalitarian:communitarian and teachers identify as didactic vs. constructivist. This dichotomy in the way we approach life’s problems and decisions is directly related to the parts of the brain engaged. There’s a direct tie to the quality of conceptual learning in that dichotomy, both in the pedagogies employed and in the way the brain works in each case. In teaching, we’d call the two basic approaches teacher-centered and didcactic vs. student-centered and constructivist. I’ve been exploring this topic from time to time in this blog, and we’ll explore it some more.
I diverge. Back to the National Board’s Propositions. Proposition #1: Allowing groups to learn their particular part of the work, and then teach it to the rest of the class, with feedback from the teacher, tells me that she understands how students learn, how the brain learns, understands her students, and uses these understandings to develop an approach or delivery to a new set of learnings that is tailored to this class. And that she trusts that her students are ready to engage in learning. Because she intends to work with them as they negotiate and construct meaning, she knows who they are and how they learn, and has tested this enough times to have confidence in it. The other teacher presents a common base of information to her class, and helps students learn it. She uses the information in the teachers’ manual, in the prepared materials, what she has learned on her own, and would probably engage a guest speaker if she knew one. Student learnings are limited to what they read, hear, and see, and are not influenced by elements in the real world that they are learning about.
These two approaches meet the first proposition, Teachers are committed to students and their learning, to varying degrees. The first teacher is planning with what she knows about the subject, what she knows about her students, and what she believes her students can do. By moving beyond the so-called tried and true (which doesn’t actually develop into good test scores), she evidences her commitment to her students’ capacity to use their own brains to learn. The other teacher appears to be committed to the publishers’ curricula she uses, and is willing to allow an outside person to speak to the class. The fact that she conscientiously applies this curriculum indicates that she has confidence in it and is committed to her students’ learning, but places bounds on how much learning she believes they can be responsible for themselves.
Proposition #2: The teacher who uses the creek visits it to decide what to teach, and what she needs to learn. As she moves through the area, she amplifies what she knows about the subjects she uses the creek to deliver; she learns more as she teaches. Locating the curricular pieces embedded in the creek and its banks enables her to understand them better, and increases the methods she can pull off the shelf to teach them. She decides to teach more than the science of the creek, and, I assume, knows those additional subjects. I say that because she looks for them embedded in the place. (You can practice this by looking for examples of fractions and alliteration in a natural area nearby. You’ll note that you have to know the subject in order to find it.)
Here are some hurdles she must overcome in organizing and delivering her curriculum via that which is embedded in the creek and its banks: Food Webs – she has to learn about them. Mathematics – where are percents, exponents, pre-algebra, coordinates on the site. Physical Science – water quality chemistry, velocity – how to measure them in a creek rather than at a lab table. Geology – water quality and velocity = erosion, riparian geology, soils, mapping, stream morphology – how much does she know and understand about them. Social Studies – maps, vegetation communities, animal communities, transport – does the community which inhabits the creek and its banks use communities and transport systems.
The other teacher may have a background in the creek and its inhabitants, either from actual experience, or from learning about them. She may use this background to add to the curricular material the class studies. However, their learnings are mainly acquired by listening, reading, and memorizing, and not from direct personal experience. And, they are less likely to be able to teach the other groups in their class via group reporting. What is contained in the teachers’ manual and prepared materials are their main sources of insight. Both of these teachers know the subjects they teach and how to teach those subjects to students again, to varying degrees.
Proposition #3: The first teacher allows students to correct misconceptions, and amplify their learnings and thoughts, as they work and report. This teacher’s strategy of having student groups report during the project is an effective method for monitoring student learning and making mid-course adjustments. Because their teacher invests in her responsibility for managing and monitoring student learning, they are allowed to monitor and adjust their own learning activities, with the concomitant result that they also manage the flow of their work. Due to the way she delivered her curriculum, she learned more about pertinent subjects as she taught. While sharing those learnings through the activities she engaged her students in, this teacher developed methods of managing and monitoring student learning such as organizing the class into work groups, and using group reporting as learning and monitoring vehicles.
The other teacher uses standard classroom management techniques to organize her students, and publishers’ handouts to manage student learning. She knows the subject as it is expressed in the publishers’ curricula, and uses prepared handouts, assignments, quizzes, and summative tests to monitor student learning. She expands her understandings as the publishers she uses expand content particulars. She probably supplements these learnings from presentations at conferences. This is standard practice, but does not induce involvement and investment in the learning, nor does it empower her students. Again, the two teachers are responsible for managing and monitoring student learning to varying degrees.
Proposition #4: Exploring new curriculum deliveries by deciding to use the creek, visiting it, looking for embedded curricula, organizing space, and employing group reporting, compared with relying on what others have developed in curriculum deliveries, forces the first teacher to pull what she understands about teaching into working memory, and use careful critical thinking to find and engage the pedagogical components and processes that will facilitate the work. (That’s a long sentence! I’ll try to tone them down.) Locating and placing embedded curricula within its thematic place in the larger curriculum of each discipline addressed is a systematic process as is group reporting as a pedagogical strategy. Using group reporting as a teaching and assessment strategy, using what emerges from them to monitor and adjust her delivery, infers that she is considering all of the components of her curricular delivery as a system. This teacher also learns from experience and incorporates these learnings into her practice as she goes. The other teacher uses publishers’ materials conscientiously, learning the way their curricula and directions are structured, and using this structure to organize her delivery and has, at some time, learned about the effectiveness of guest speakers. As before, the two teachers think systematically about their practice and learn from experience to varying degrees.
Proposition #5: There are two learning communities associated with the first teacher. First is her classroom community, a true community of learners, The teacher allows herself to learn with her students, developing concepts together, organizing the class into work groups, and consolidating learnings via group reporting. Learning about the creek with her students generates a learning community in which all members benefit and grow. This kind of community, classroom as learning community, mirrors the dynamics of learning communities of educators in which, as proposed by the National Board for Professional Teaching Standards, “. . . teachers contribute to the effectiveness of the school by working collaboratively with other professionals on instructional policy, curriculum development and staff development.” Because the first teacher intimately involves her students in the process of learning, her class seems to be based upon the concept of a community engaged in mutual learnings; a community which shares learnings, discoveries, and methods in order to achieve a community goal.
Teachers are also members of their own professional learning communities. For this teacher, that would include the teacher who presented at the conference which started her on this journey, and the other teachers in her school. It also includes the school administration and resource personnel, and their interactions like curriculum development, staff development, and so forth. We haven’t met most of this community, so can’t say much about what they do, or assess how she works with other professionals in her school and district. Working together, this community has the potential to evaluate school progress and the allocation of school resources in light of their understanding of state and local educational objectives. The other teacher may be active in her professional learning community, but we don’t have any information with which to assess that. The two teachers developed different classroom learning communities. The first is based upon a community engaged in mutual learnings; a community which shares learnings, discoveries, and methods in order to achieve a community goal. The other community is less egalitarian, with students learning from the teacher, who is learning from the publishers and other external authorities. Most meaning in this classroom is learned, rather than being negotiated. Again, these two teachers are members of learning communities, classroom and professional, to varying degrees.
In sum, both teachers taught their students about creeks and creek communities. Only one teacher taught in a way that involved and invested her students in their work and learnings, and empowered them as persons. This was the teacher who started her students in the real world, developed incipient conceptual learnings, then used her subject knowledge and her knowledge of her students, to create an environment in which the students went to the publishers’ curricula as their efforts generated needs to know information, or to seek confirmation of what they believed they were beginning to understand. They were assuming ownership of their learning. This is what we need to teach for.
 This is a regular feature by CLEARING “master teacher” Jim Martin that explores how environmental educators can help classroom teachers get away from the pressure to teach to the standardized tests,and how teachers can gain the confidence to go into the world outside of their classrooms for a substantial piece of their curricula. See the other installments here, or search Categories for “Jim Martin.”

by editor | Jun 7, 2013 | Place-based Education, Schoolyard Classroom
Stepping into the Real World – What happens when you open the door
by Jim Martin,
CLEARING Associate Editor
Let’s explore what science and environmental education could look like if we were to use the real world as if it were an authentic source of curriculum, and a place to start our work. The place we’ll explore is a suburban school yard. There is a small creek at the edge of the school property. Its west side has a tall fence at its edge; beyond is an apartment complex. On the school side, the bank faces a playing field. There are trees and shrubs along both sides of the bank. Closer inspection reveals that the stream has two riffles along its length, a glide or run above the first riffle, between the two riffles, and beyond a pool at the end of the second riffle. Riffles are places in a stream where the water splashes and turns white. Glides or runs are places where the water moves quickly, but doesn’t splash. Pools are places where the water moves slowly, and has a relatively smooth surface. (more…)
by editor | Jan 4, 2013 | Environmental Literacy, Questioning strategies, Schoolyard Classroom
Do It Yourself First: Leading Student-Directed Inquiry

by Jim Martin
CLEARING guest writer
 f you’ve never taken your elementary, middle, or secondary students out of the classroom to learn, and can’t find a helpful mentor or workshop, it’s okay to learn to use the real world to generate curricula and teach for understanding rather than to pass tests just by doing it. Just make a plan and stick to it, and you’ll be okay. Try a place on your school grounds first, then move to a place in the community when you’re comfy.
There is a simple way to do a student-directed inquiry outside your classroom, involving observations on invertebrates. You can use it to discover whether this kind of work is comfortable for you to do, and if it generates curricular content that satisfies your anxieties about meeting mandated standards and benchmarks. You can start it on your school grounds, or if you’re not comfortable with that, right in your classroom. The only caveat is that you have to let your students think and ask questions, and follow the parts of the project that capture their interest. That is, after you’ve first guided them (and yourself) through the process.
ALERT: You need to be a CLEARING subscriber to read the rest of this article.
(enter password then hit return button on your keyboard for best results)
[password]
The nice thing about the project we’ll be describing is that it begins with you facilitating a guided inquiry. It doesn’t matter what grade level you teach, the basic work applies to all of them. The vocabulary and complexity of conceptual content will vary with grade level and student experience, but the basics apply to all levels. The plan is this: We’ll make a small compost heap, then see what comes to live in it. Then we’ll have our students do the same. Simple, but loaded with potential.
First, do your own inservice, perhaps this summer. Start the compost in your own yard or somewhere on the school grounds as your source. Don’t place it where it will always be in direct sunlight, since it needs to stay moist. Put about 5-10 gallons worth of different kinds of plant material in it and turn it once a week with gloved (or ungloved) hands. Keep it moist, but not wet. It’s necessary to start outdoors to attract the invertebrates and microbes which will populate your students’ compost ‘piles.’ As you tend your compost heap, notice what is living there. (If you’ve already done this, I’ll bet you’ve gone to a book or the web about what you’ve found. That’s your brain doing what it’s designed to do.)
As you do your work, try out some learning activities. What is the temperature at the surface of the heap, and in its depths? How do you go about measuring the temperatures? Any glitches? Ask yourself how any temperature differences might have come to be. If it’s not directly explainable to you, who might you ask to find out? (This is a skill we all have to develop when we move out into the real world.) What mathematics activities can you use to make sense of the temperature data? What tells you more, the numbers themselves, or their graph, average, median, range? Would the data be different if the compost heap was larger or smaller? Let’s look at more of the things we can learn.
After your compost heap has been working awhile, you should be finding an increase in the numbers of invertebrates living there. If this isn’t the case, go to places where plant material is obviously decaying and bring samples back to your heap. Keep a record of how many species you find in your heap as you turn it, and how many of each you observe. This means you’ll have to be systematic about how you turn the heap. And about how you record the information you measure, count, and observe. You can pass these skills and understandings on to your students.
As you count species and their numbers, use that data to track species diversity in your compost heap. As a rule of thumb, the greater the species diversity, the healthier the system. Whether you work with kindergartners or high school seniors, you’ll need to know something about species diversity. You can google the term, find some sites which explain it in a way you can understand, and which detail some of the math used to make sense of the numbers. Here’s one you can use; a little esoteric at first glance, but ultimately doable; Simpson’s Index, D = Σ ni(ni-1)/ N(N-1), where D is Simpson’s Diversity Index, Σ stands for ‘the Sum of,’ ni is the number of organisms you counted in the ith species (so the number of organisms in the 3rd species you counted would be n3, and i goes from 1 to the total number of species you counted), and N is the total number of individuals counted among all species. This means that you take the sum of the numbers you get from multiplying the number you counted in each species times that number minus 1, then divide that sum by the total number of individuals you counted times that number minus 1.
Try it for 3 species: Species A, with 10 individuals; Species B, with 5 individuals; and Species C, with 20 individuals. The first ni set is 10(9), the second is 5(4), and the third 20(19), which totals to 490. There are 35 individuals all together, so the denominator is 35(34) = 890. Dividing 490 by 890 gives you about 0.56. What if the counts were 23, 51, and 36? Your numerator and denominator should be 4,316/11,990. If this is confusing, say so in a comment below, and I’ll get back to you with more details.
Sounds complicated, but by the time you’ve done three or four sets of species, you’ll get it down. Just be sure that you sum all the individual counts times themselves minus 1 before you divide by the total counted times the total counted minus 1. The answer to all this, D, gives you a number you can compare with other counts you or your students make. Remember, the reason you need to try this diversity calculation is to get an idea of one way that diversity is described. With your students, you can just use the total number of species present to stand for the same thing. This is the simplest math which can be used to estimate species diversity, the total number of species, a number students can use to compare the number of species in different compost heaps, and which may correlate with other measures of diversity.
There is a spectrum of ways to name diversity: number of species, species richness, species evenness, or a calculation like Simpson’s Index. None do a perfect job, since diversity is a dynamic with many aspects. For now, you can only choose one and use it consistently until you have good reason to use another statistic. We’ll take another look at this in the next blog.
Use your counts of living things to graph a population curve. Choose one species and plot it with time on the x-axis, and number of individuals on the y-axis. This is a population growth curve, and they are an indirect way of determining how an environment treats a particular species residing within it. In setting up your compost heap, you’ve created a new environment, and populations living within it should increase during the initial exploitation phase. Soon enough, those curves will change, raising nice inquiry questions.
Use the heap itself for learning. How big is it? Is it always that big? Bigness can be derived from measurements that students make. How tall is it? How wide? How long? How can you determine its volume? Do any of those numbers correlate with the range of temperatures in the different compost heaps? Species diversity? Population curves? Temperature range and diversity?
What about the biology of the organisms living in the heaps? If you’re up to it, you can take a piece of liver, blend it with a little water or electrolyte like pedialyte, then introduce a drop of this to a container with 250 ml or more of hydrogen peroxide (H2O2 ). Take the temperature of the hydrogen peroxide before adding the liver extract, then periodically during the next 20 minutes. As simple carbohydrates are metabolized to produce useable energy in the form of ATP in nearly all organisms from microbes to Homo sapiens, the extra oxygen atom in one of the intermediary products, hydrogen peroxide, is released leaving water (H2O), an oxygen atom (O), and the energy which held the oxygen atom in place. That energy isn’t re-used, and goes off as heat. Compare the results of this experiment with your data on population and temperature. Is there something to be learned? Might your students understand the basics of what they observed?
What can you find out about four of the species in your compost that explains how they are able to live there? The organisms you find are living in a dynamic relationship which keeps the entire community alive, an economy which cycles materials and moves energy in a productive way. Can you build some elements of a food web from the information you have? What else can you find out about the biology and ecology of compost heaps?
If you teach or use language arts, how can you use the compost heap and its components as metaphors to drive a piece of writing? A piece of art? Music? If you teach science, and have never used these arts and humanities deliveries, try one. You might be surprised at what you’ll learn. I certainly have been.
When you’ve studied your compost heap long enough to feel comfortable with it, have your students learn some thing about them. Use the piece you have the best handle on. The first time through the process with your students, you demonstrate each step. Let students ask questions or make observations as you feel comfortable. You can use your own compost, and demonstrate how to turn it to expose the invertebrates living there. (If you’re up to it, you can find out how to plate out microbes that will be living there, and find out what they do and who eats them.)
When you’re ready for your students to do theirs, have each group start compost heaps somewhere in the schoolgrounds, one 5 gallons in size for each group of four or five students. You can also have students bring in their own mulch, etc., or place boards on the ground at home then collect what’s living on and under them including any molds they find. You might suggest they place the animals in a jar of moist compost, keeping the lid slightly ajar for air, and simply bring the board in and set in in their compost heap. Once compost heaps are doing well (outside the building), you can make ‘sand traps’ by filling plastic bucket lids with a layer of sand and placing them next to a compost heap. Any small mammals or birds who are attracted to the compost will leave footprints in the sand. These don’t always work, but are pretty neat when they do. This will raise questions they can begin to answer.
[/password]
 This is the twenty third installment of “Teaching in the Environment,” a regular feature by CLEARING “master teacher” Jim Martin that explores how environmental educators can help classroom teachers get away from the pressure to teach to the standardized tests, and how teachers can gain the confidence to go into the world outside of their classrooms for a substantial piece of their curricula. See the other installments here, or search Categories for “Jim Martin.”

by editor | Oct 5, 2012 | Schoolyard Classroom
 by Bobbie Snead
Straub Environmental Learning Center
 he male osprey swoops down to join his mate on the enormous stick nest in Minto Brown Park. Sixty yards away, the third graders from a local elementary school gasp and clap in delight. I’ve taught them about ospreys in their classroom and now they’re getting to see the real thing. They are more excited than if they’d been on an African safari. This moment is my passion. (more…)

 Why connecting students with natural resource areas have educational benefits.
  Sites and Site Selection
 Changing Teacher Roles
 Increase Community Contact
 Field Techniques